first written: 2026-08-01 last update published: 2026-08-04
There's a small porch at the back of #thisOldClownHouse that has been showing some signs of a leak somewhere in the roofing. A piece of trim near the porch roof fell off a few months ago, and there's paint pulling away in a way that indicates water came in behind it.
I've had this on my "to look at" list for some time.
We've been having roofers come by to look at some of the more main roofs, and when I remembered to have one of them take a look at the roof on the back porch they told me it looked great.
.. this lead me to some confusion, and as the porch roof is within reach of our larger ladder (which is as high as I'm willing to climb), When I next hauled the ladder out to clear gutters, I took a look myself.
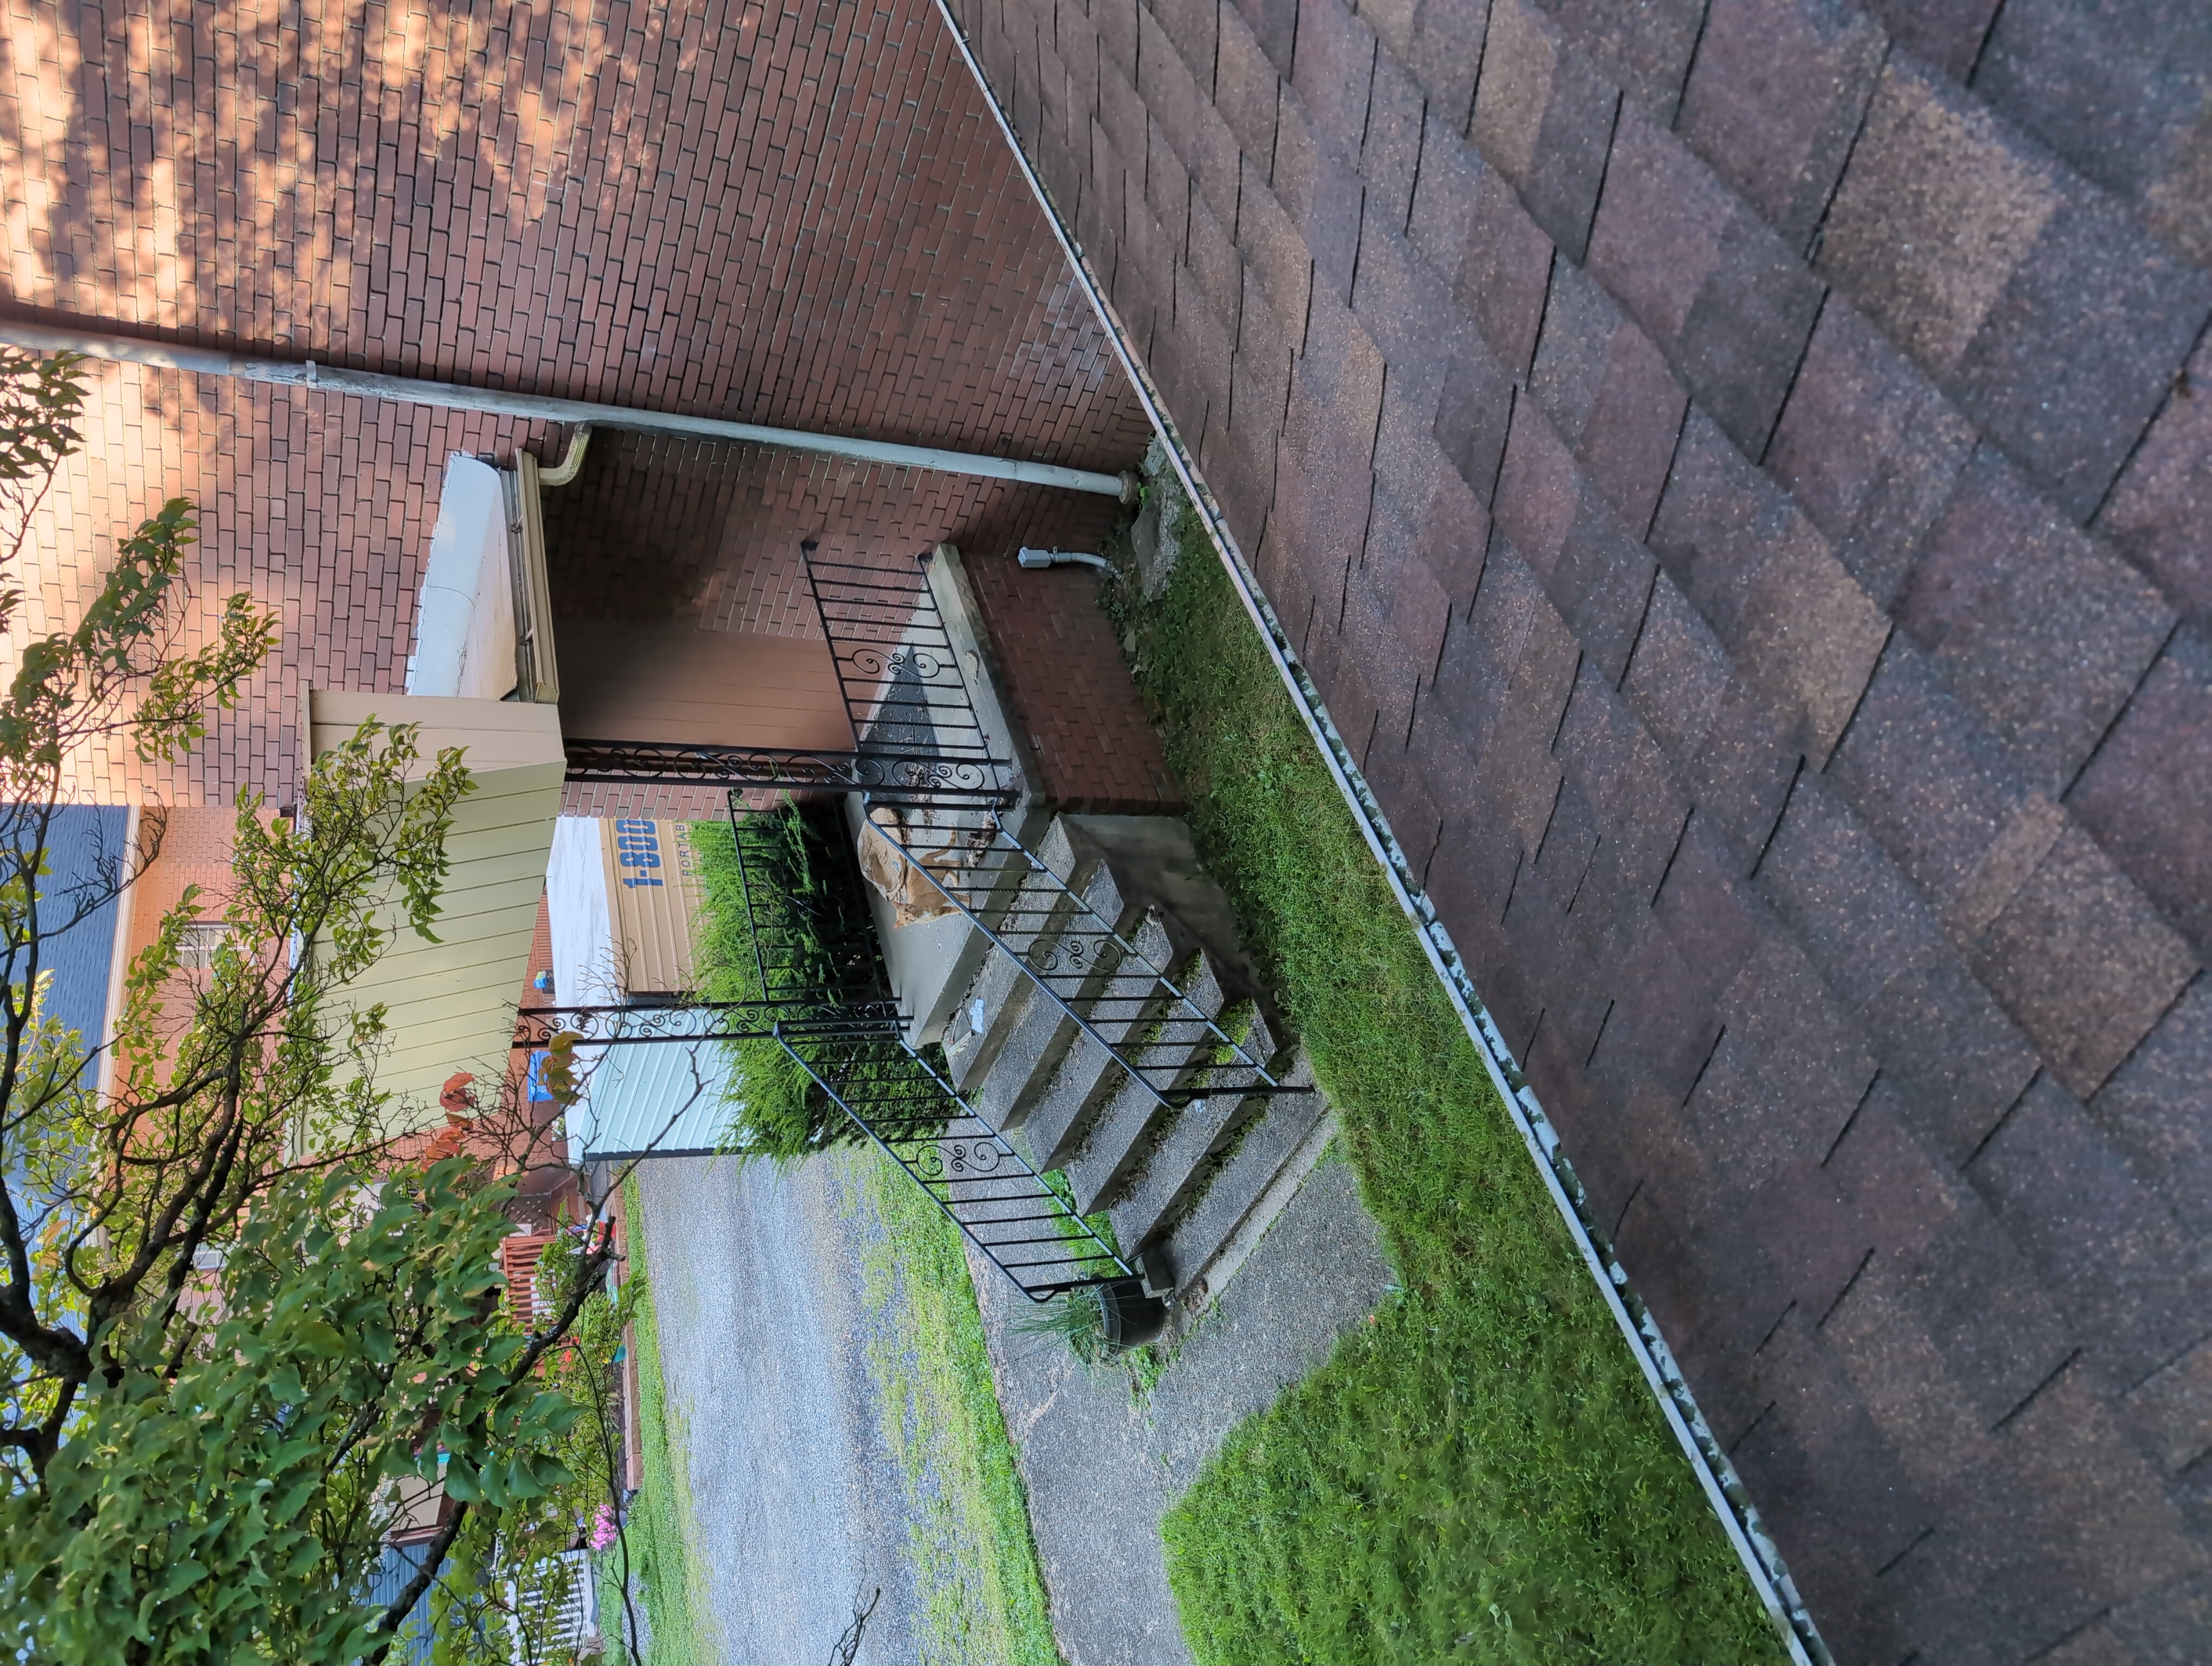
Now, I have no idea why the roof above the porch is the shape it is, I am going to assume the answer is largely some combination of "aesthetics" and "cost-savings". Essentially, it is shaped like a 3 sided box. One side is the brick of the main building, and the other two, from the outside have a pretty wood paneling that lines up with design elements from the front face of the building. The backside, which isn't visible from the alley, is open, and has a gutter which takes all the water that comes in to that box and sends it on its way.
And the roofer was right, the modified bitumen that coats the inside of that structure looks great.
However. The damage I was seeing was to one of those panel walls, and to the front corner of the base of the panel structure. If you look closely at the above photo, you can see that the paneling has some depth behind it. And this is where we were having an issue.
Now, here you can see what I was talking about when I said that this lined up with an existing design element. I don't know why this aluminum clad ridge runs the length of the building, but it does, and clearly someone decided that it would look good for the roof of the back porch to line up with that... despite that being too high up to place the actual roof of the porch. Thus, our weird little walls here.
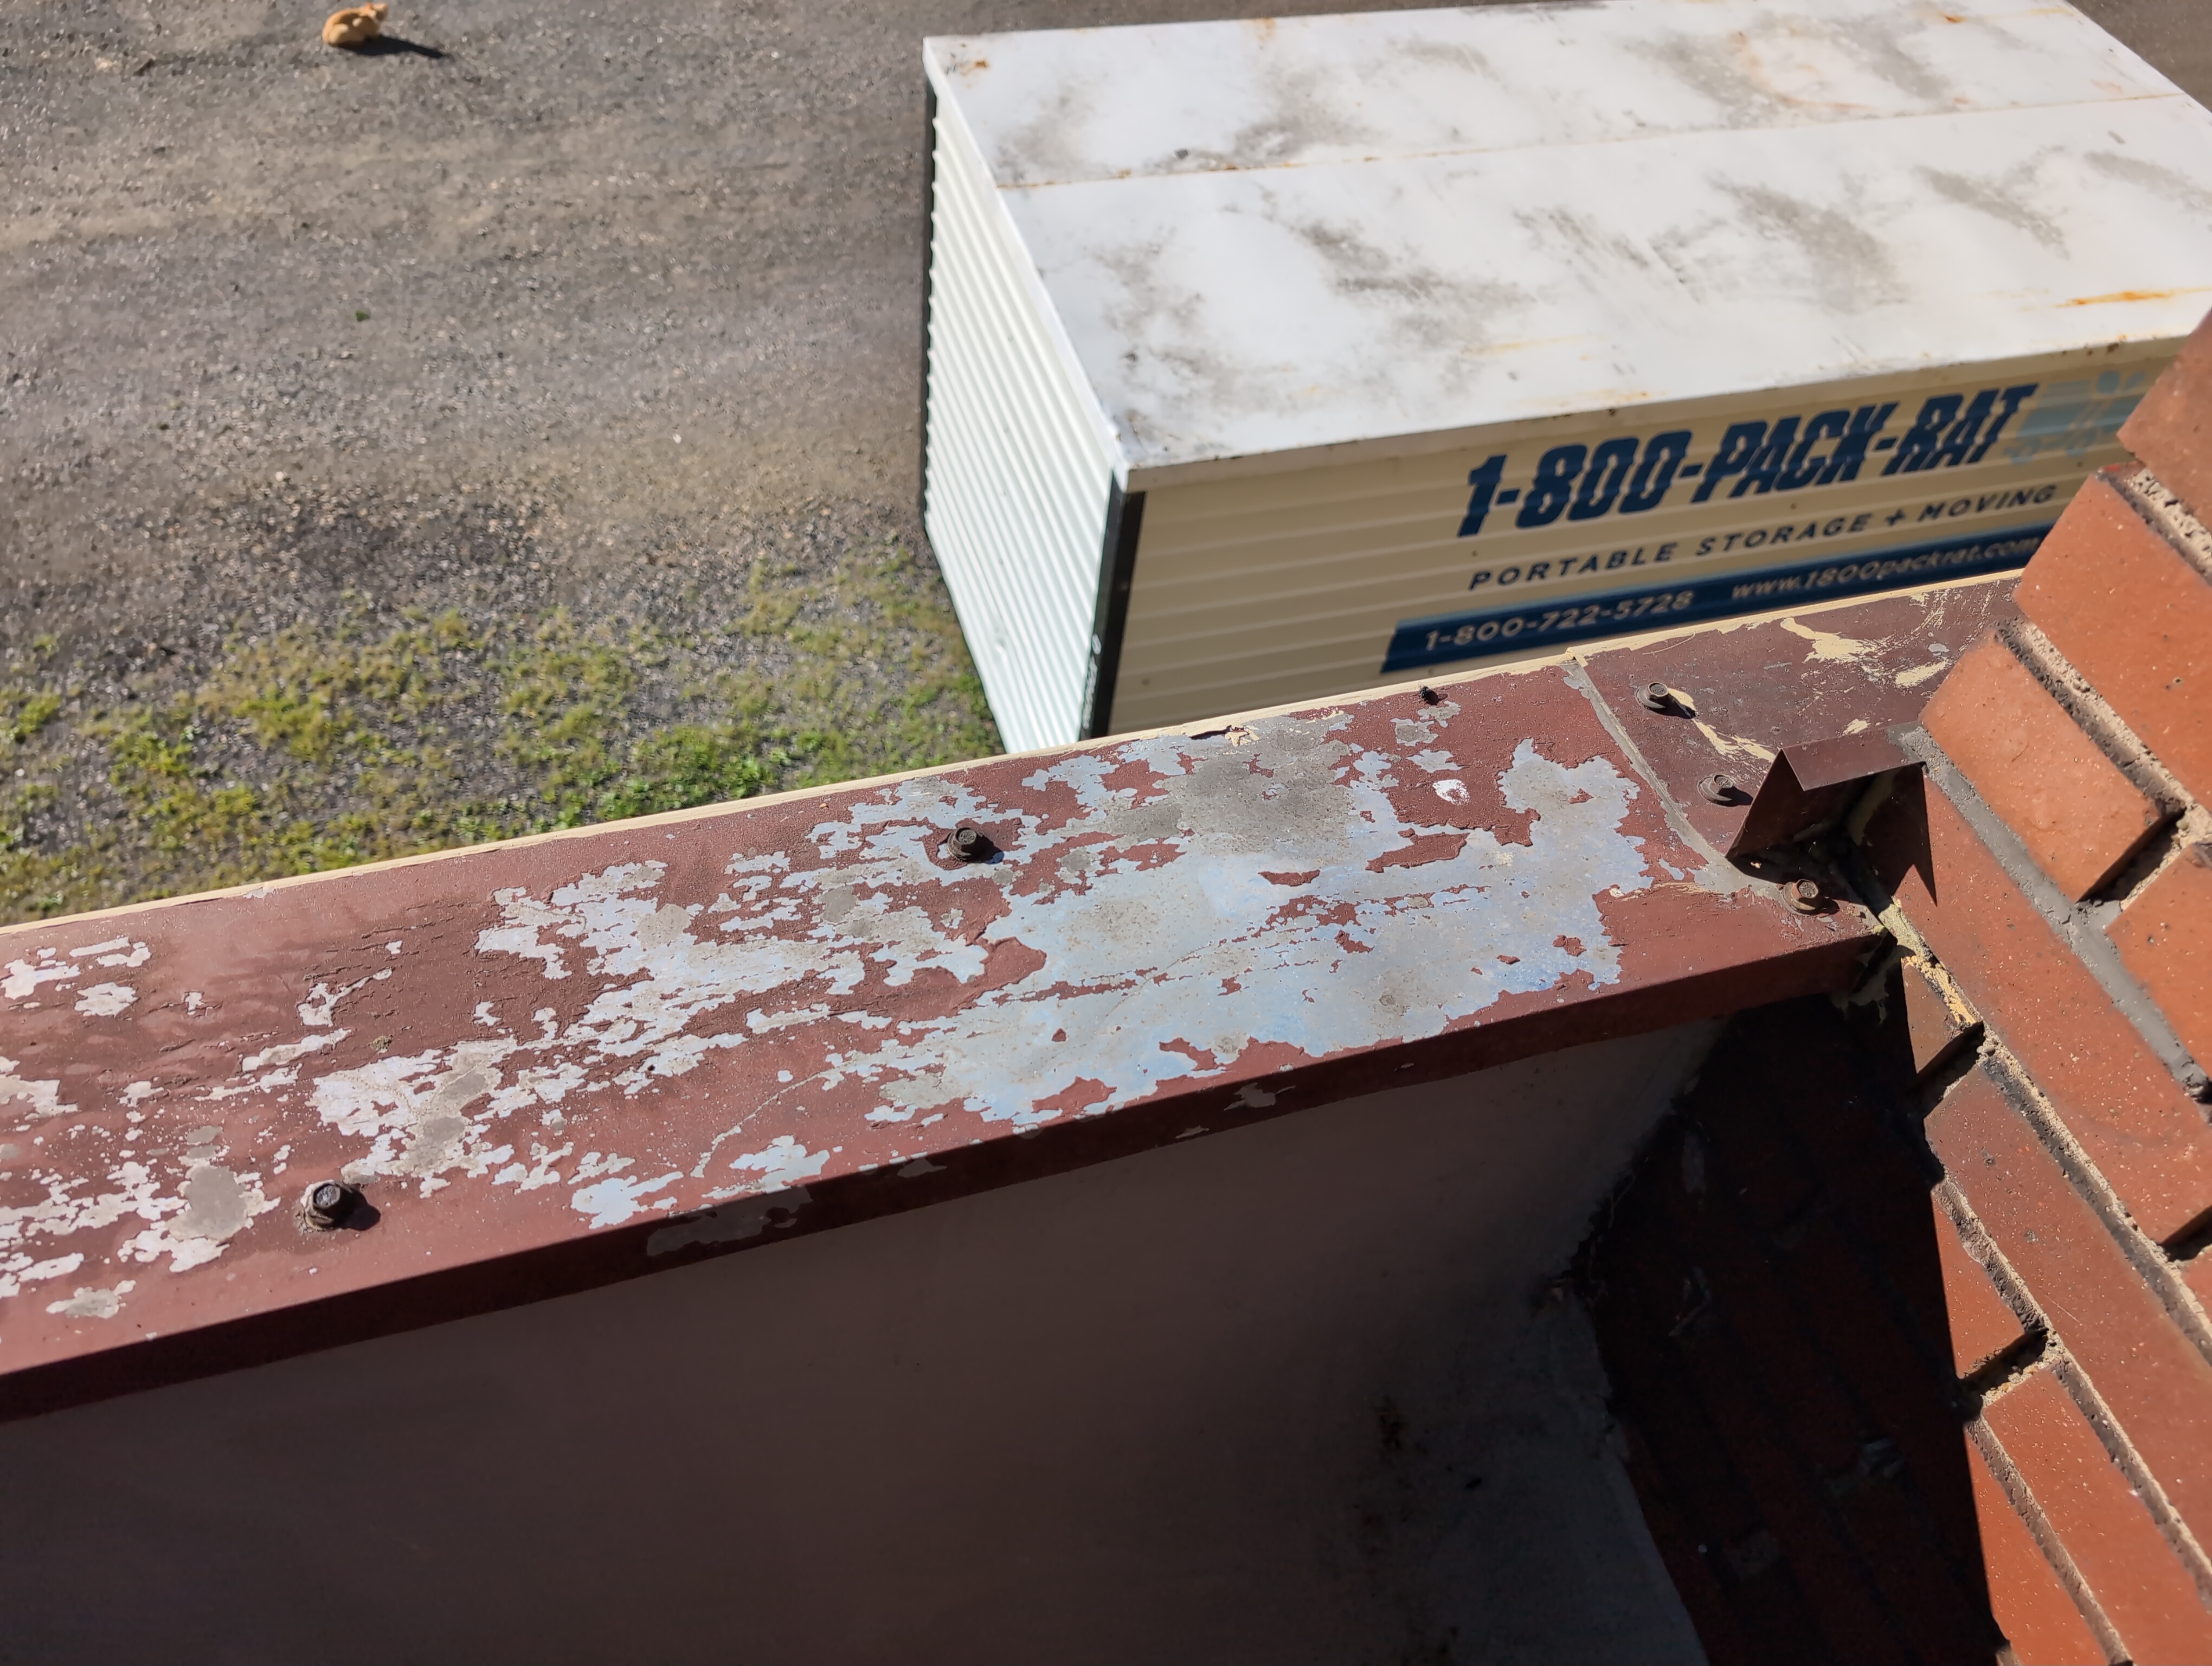
And when I took a look at the metal cap of the wall that's been having issues?
I found these:
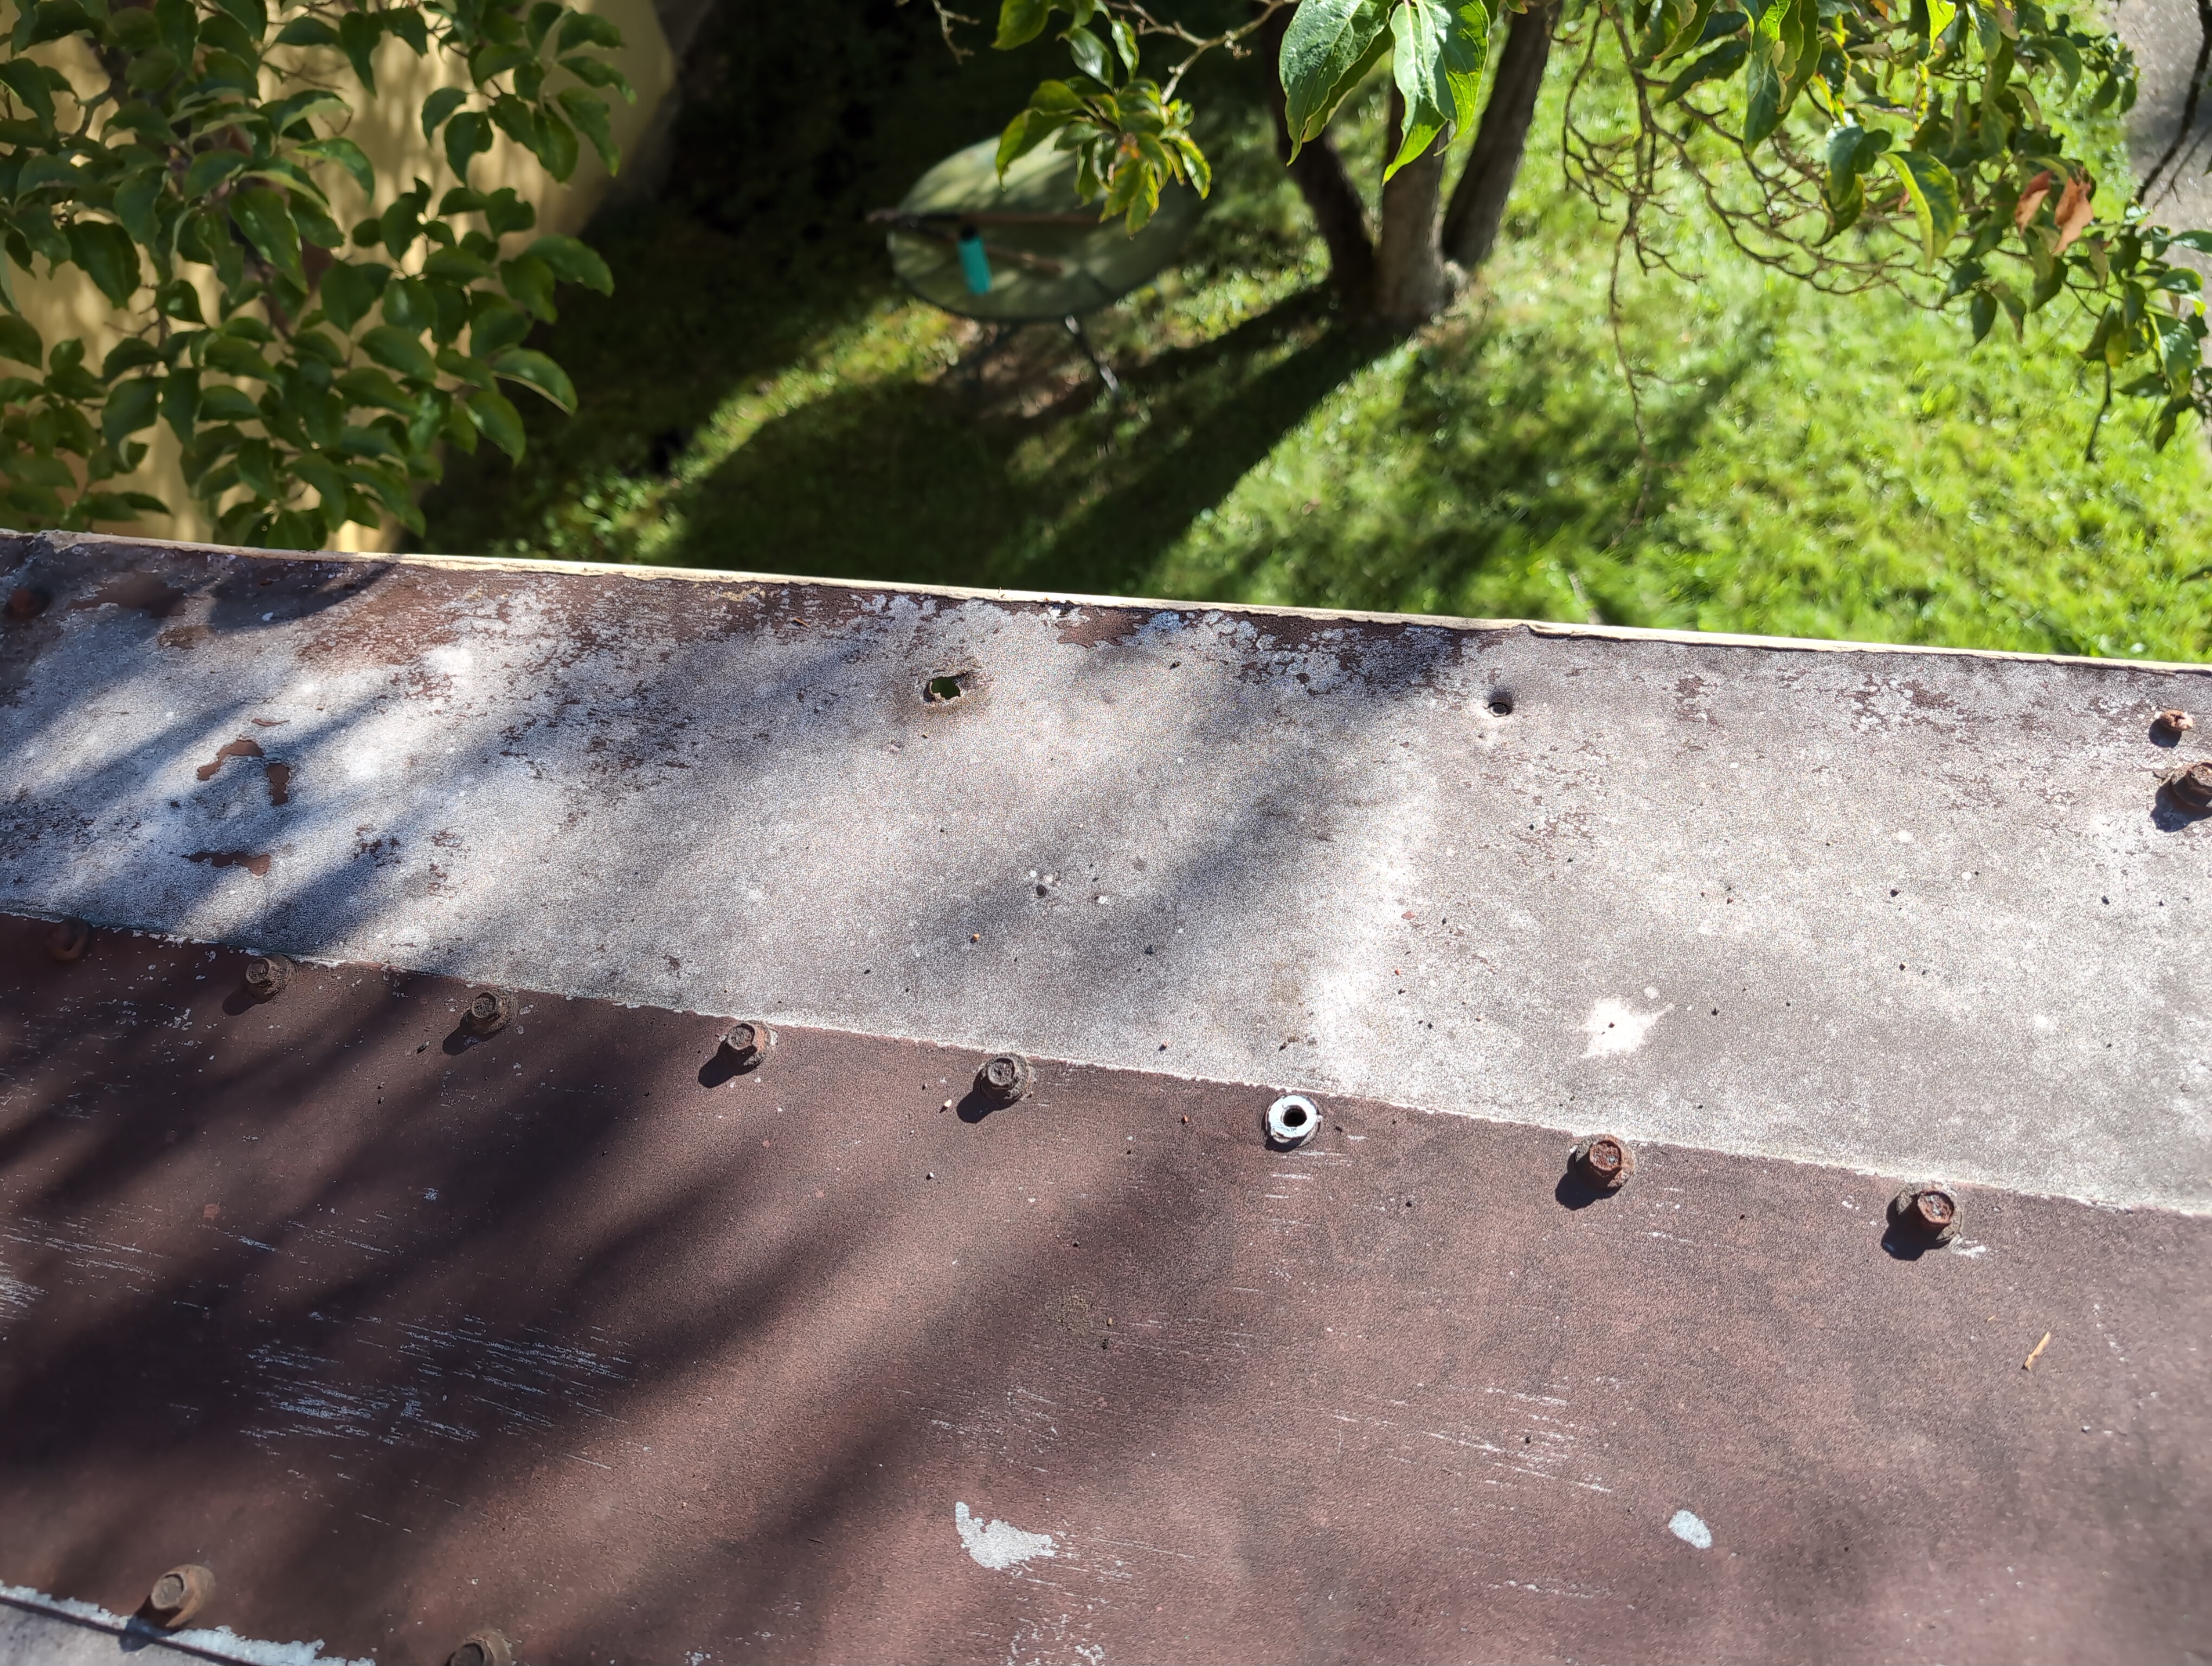
I don't know how these heavy duty bolts came off of this paneling. I don't know when these bolts came off of this paneling, but I do know, that's where the water's been coming in.
So I came in after gutter clearing that Thursday morning with the knowledge that I needed to investigate further on another day, and one soon. I can't just let that kind of damage continue, we get some amount of rain practically every other day here.
And so, as a big rainstorm was expected to come in on Sunday..
Saturday morning, 9:00 AM, I was headed back out to the roof.
Having looked at the situation, my plan was to unscrew and remove some of the metal panels, check how badly the wood was damaged, then close it back up and figure out a way to at least temporarily patch the gaps caused by the holes in the metal so that it wouldn't get drastically worse during the rain, planning on coming back to it on Tuesday with a plan to fix whatever I found.
By the time I'd removed about 10 of the bolts (when are they bolts versus when they're screws? These had hex heads but sharp tips) I was starting to suspect I might have a hard time getting this back together in a watertight way. There had clearly been some kind of two material washer used for sealing them in the first place, but those were sometimes coming off with the screw, sometimes sticking to the plate, and sometimes splitting in half.
Oh, and somewhere before I'd even removed that many, I discovered that a few wasps had decided to build a home on the other wall of this roof. I decided to simply make sure that I moved slowly whenever I got close and to try to mostly stay away from them. I got lucky and didn't end up having any trouble from them while I worked.
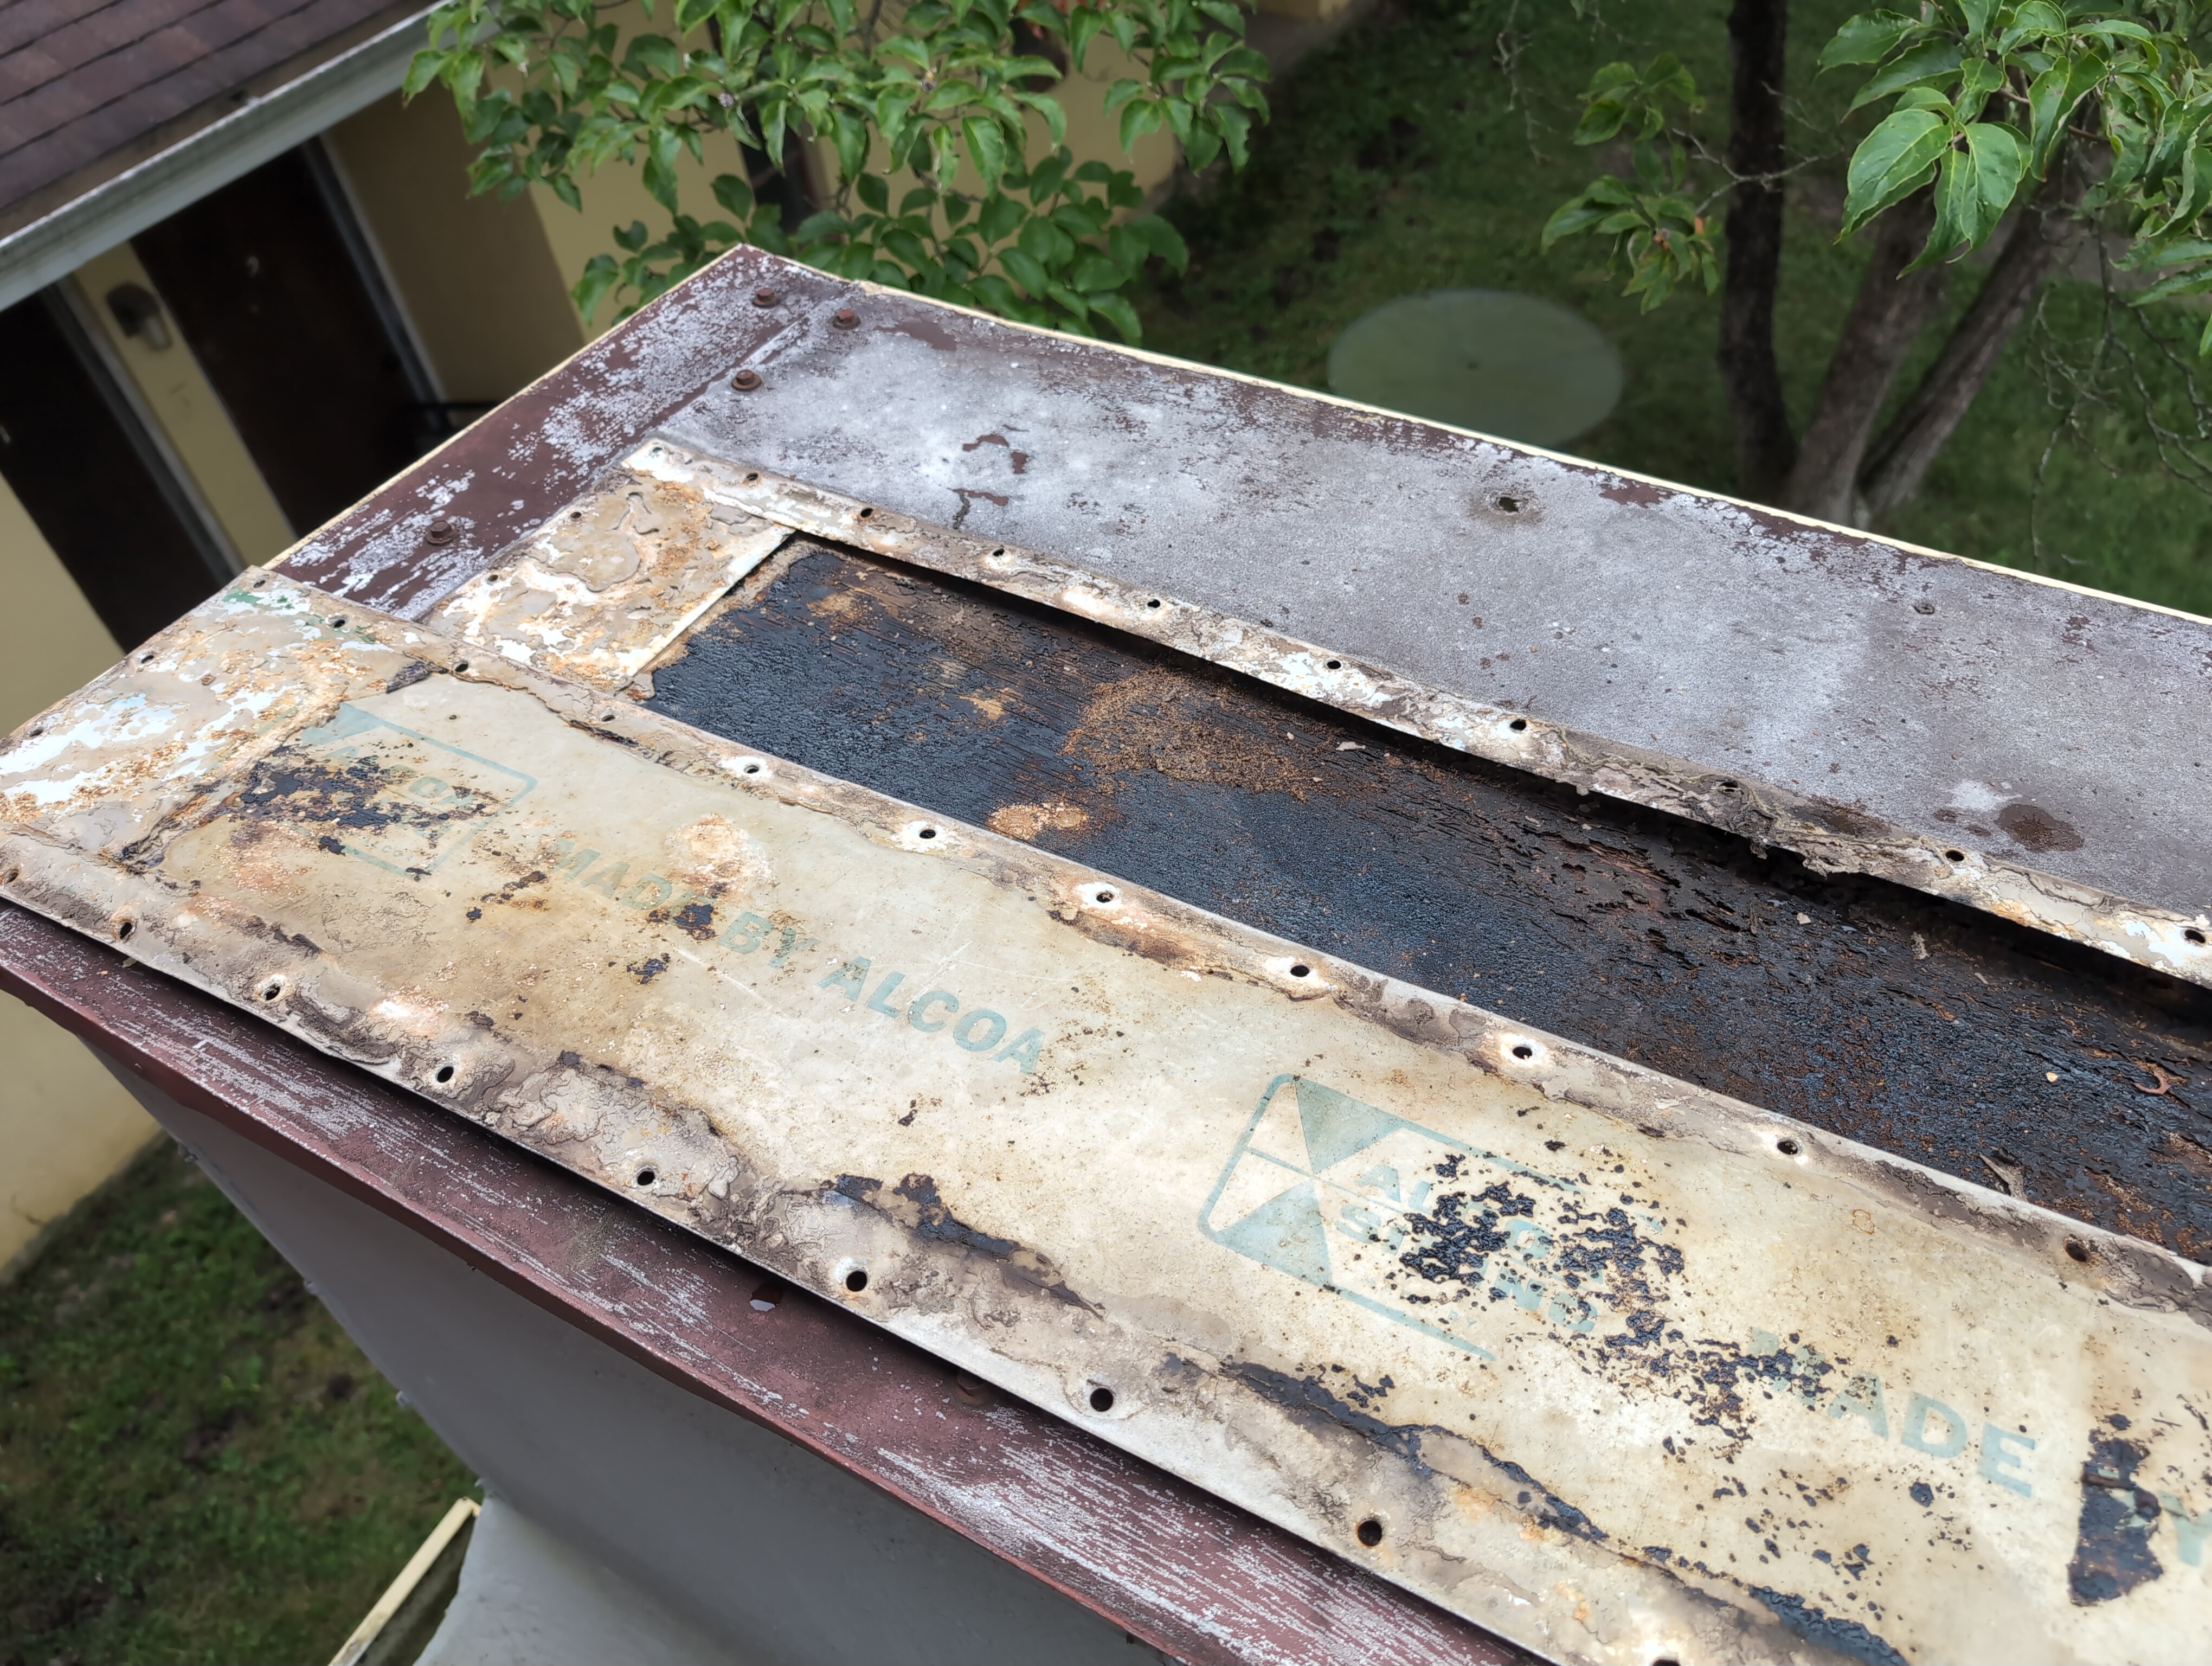
By the time I managed to actually remove the center plate some 44 additional bolts later, I knew that at the very least I'd be buying replacement bolts and washers, if that was even still an option. Methods of construction change, and that often means that things that were readily available when something was first done just aren't when it finally wears out. But as the rust-red on these turned out to not just be the paint colour.. these were going to need to be replaced somehow.
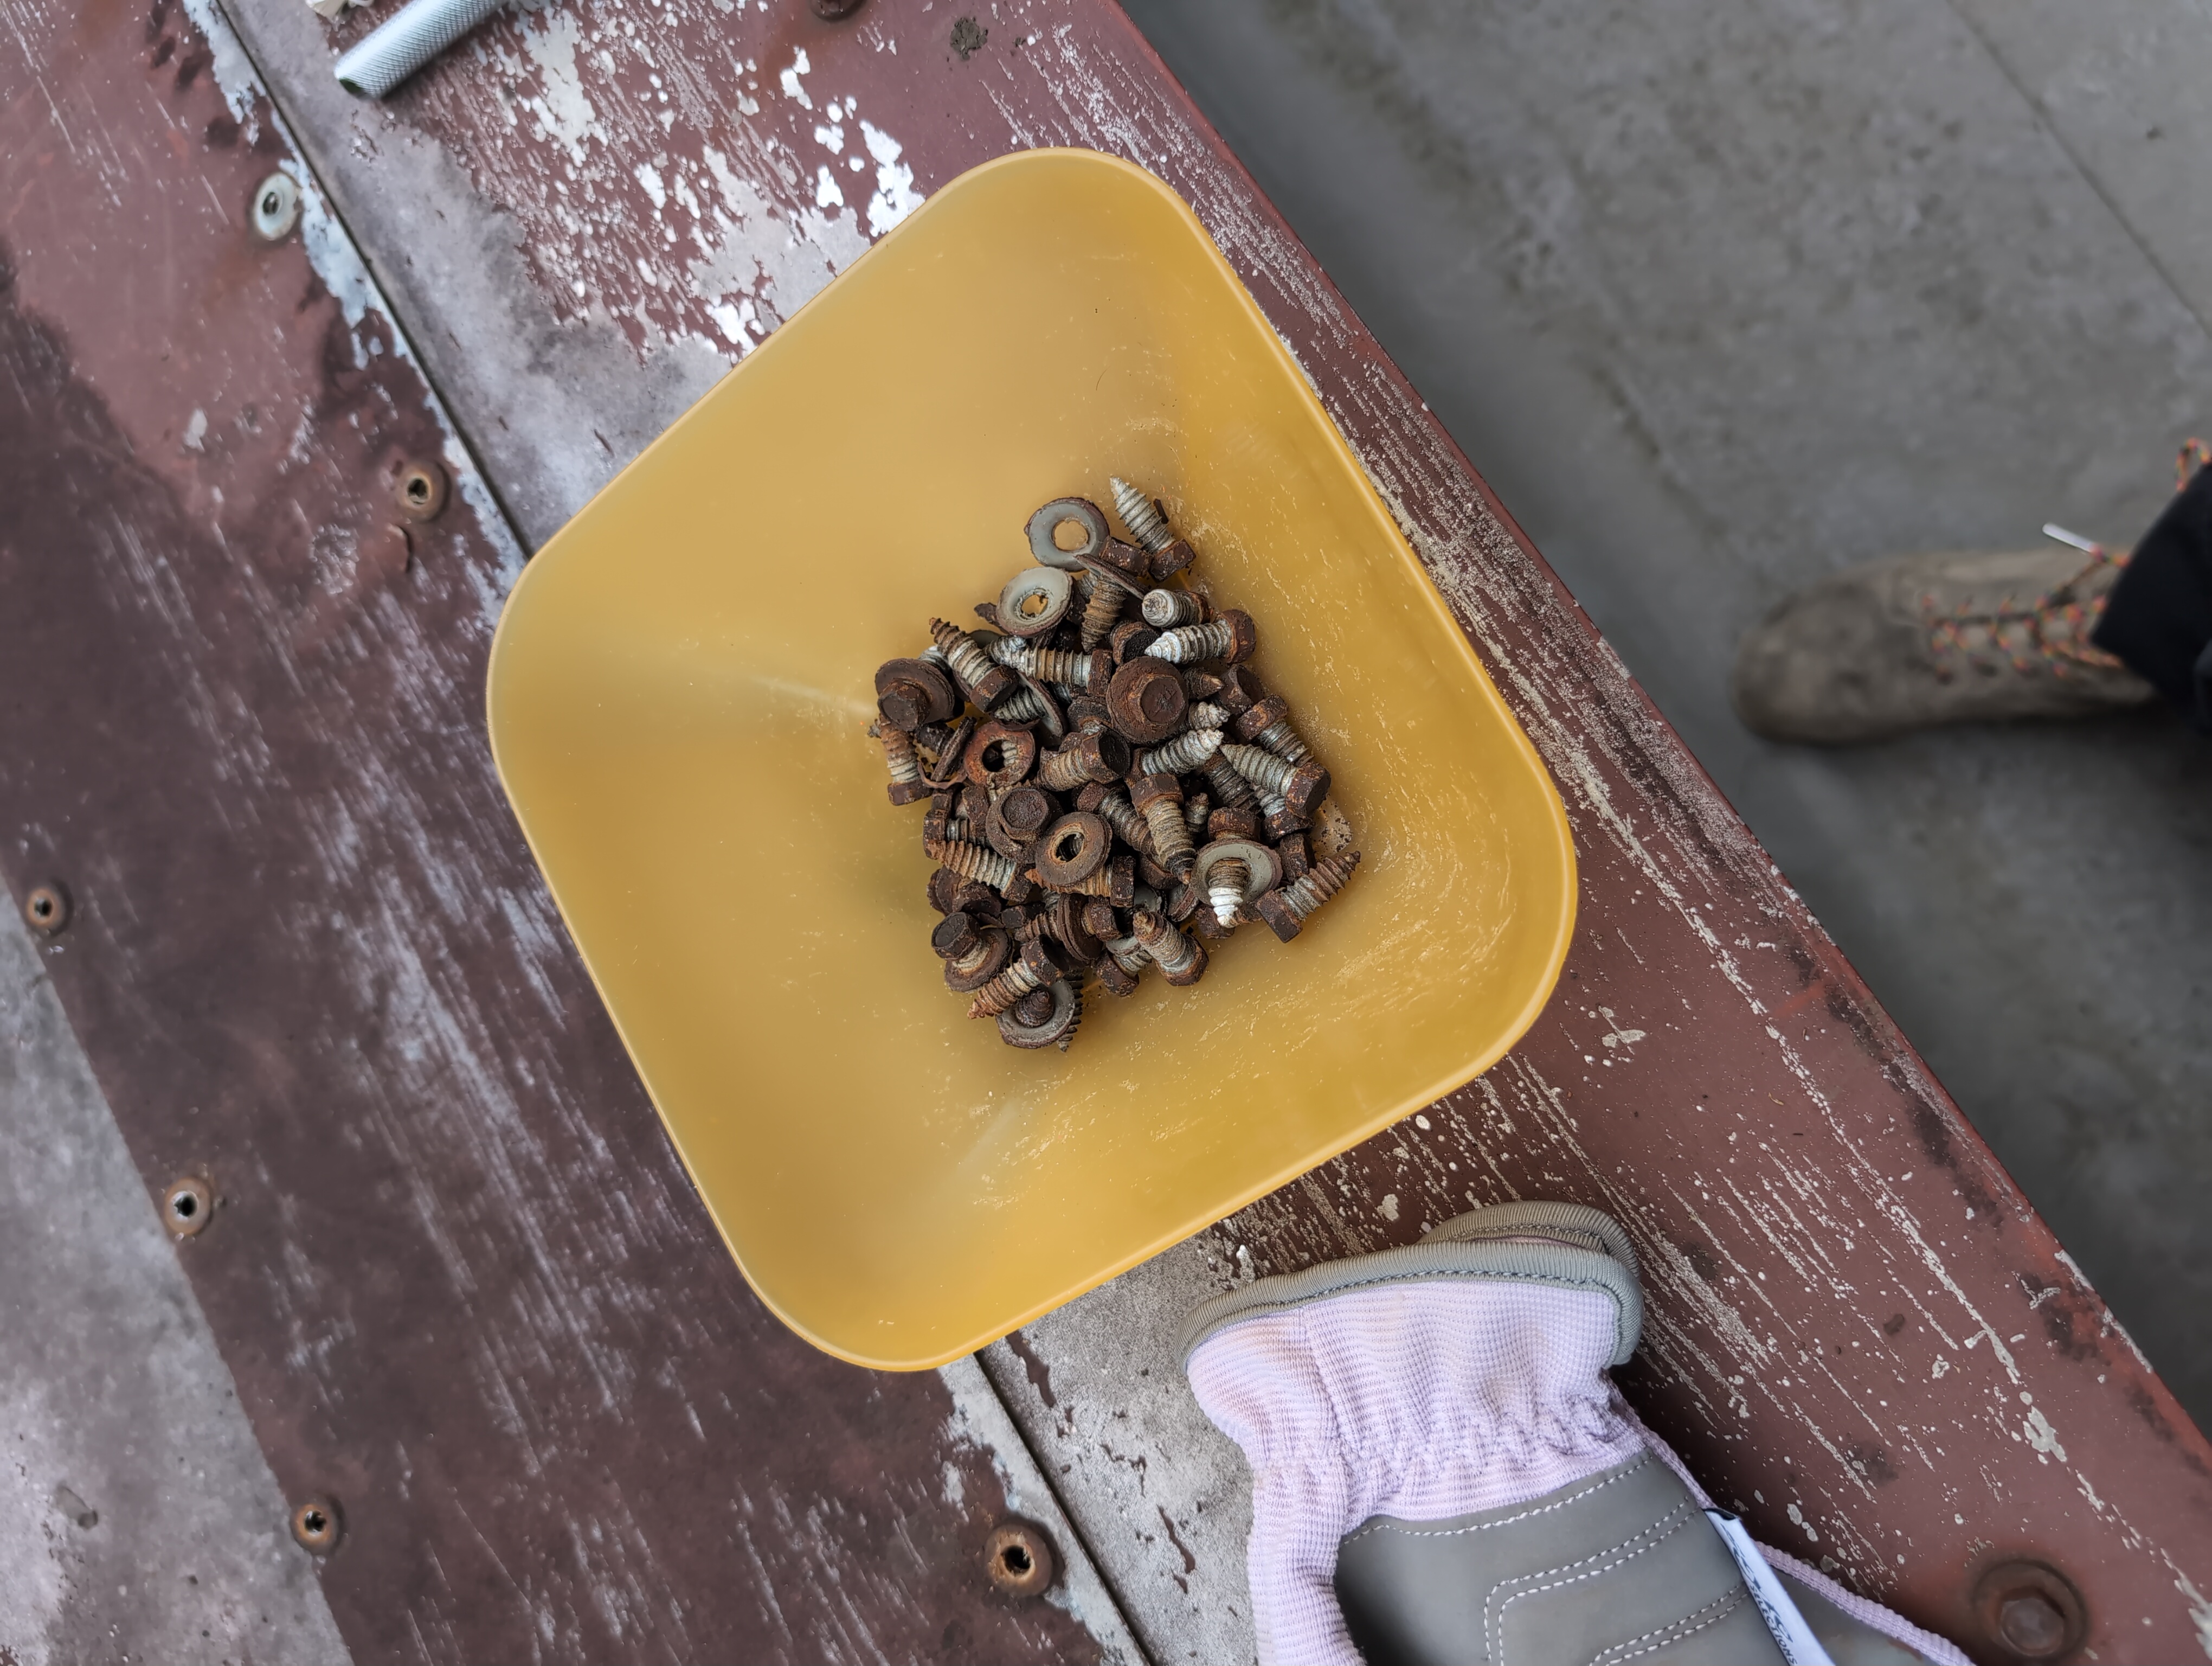
Luckily for me, the center panel was labeled by its manufacturer, so I could identify that we were dealing with aluminum siding, which was at least something.
The wood underneath that first panel was blackened, presumably with tar, but was also rotting away, and was actively wet.
I got the second panel off and had pieces of board fall apart at a very light touch.
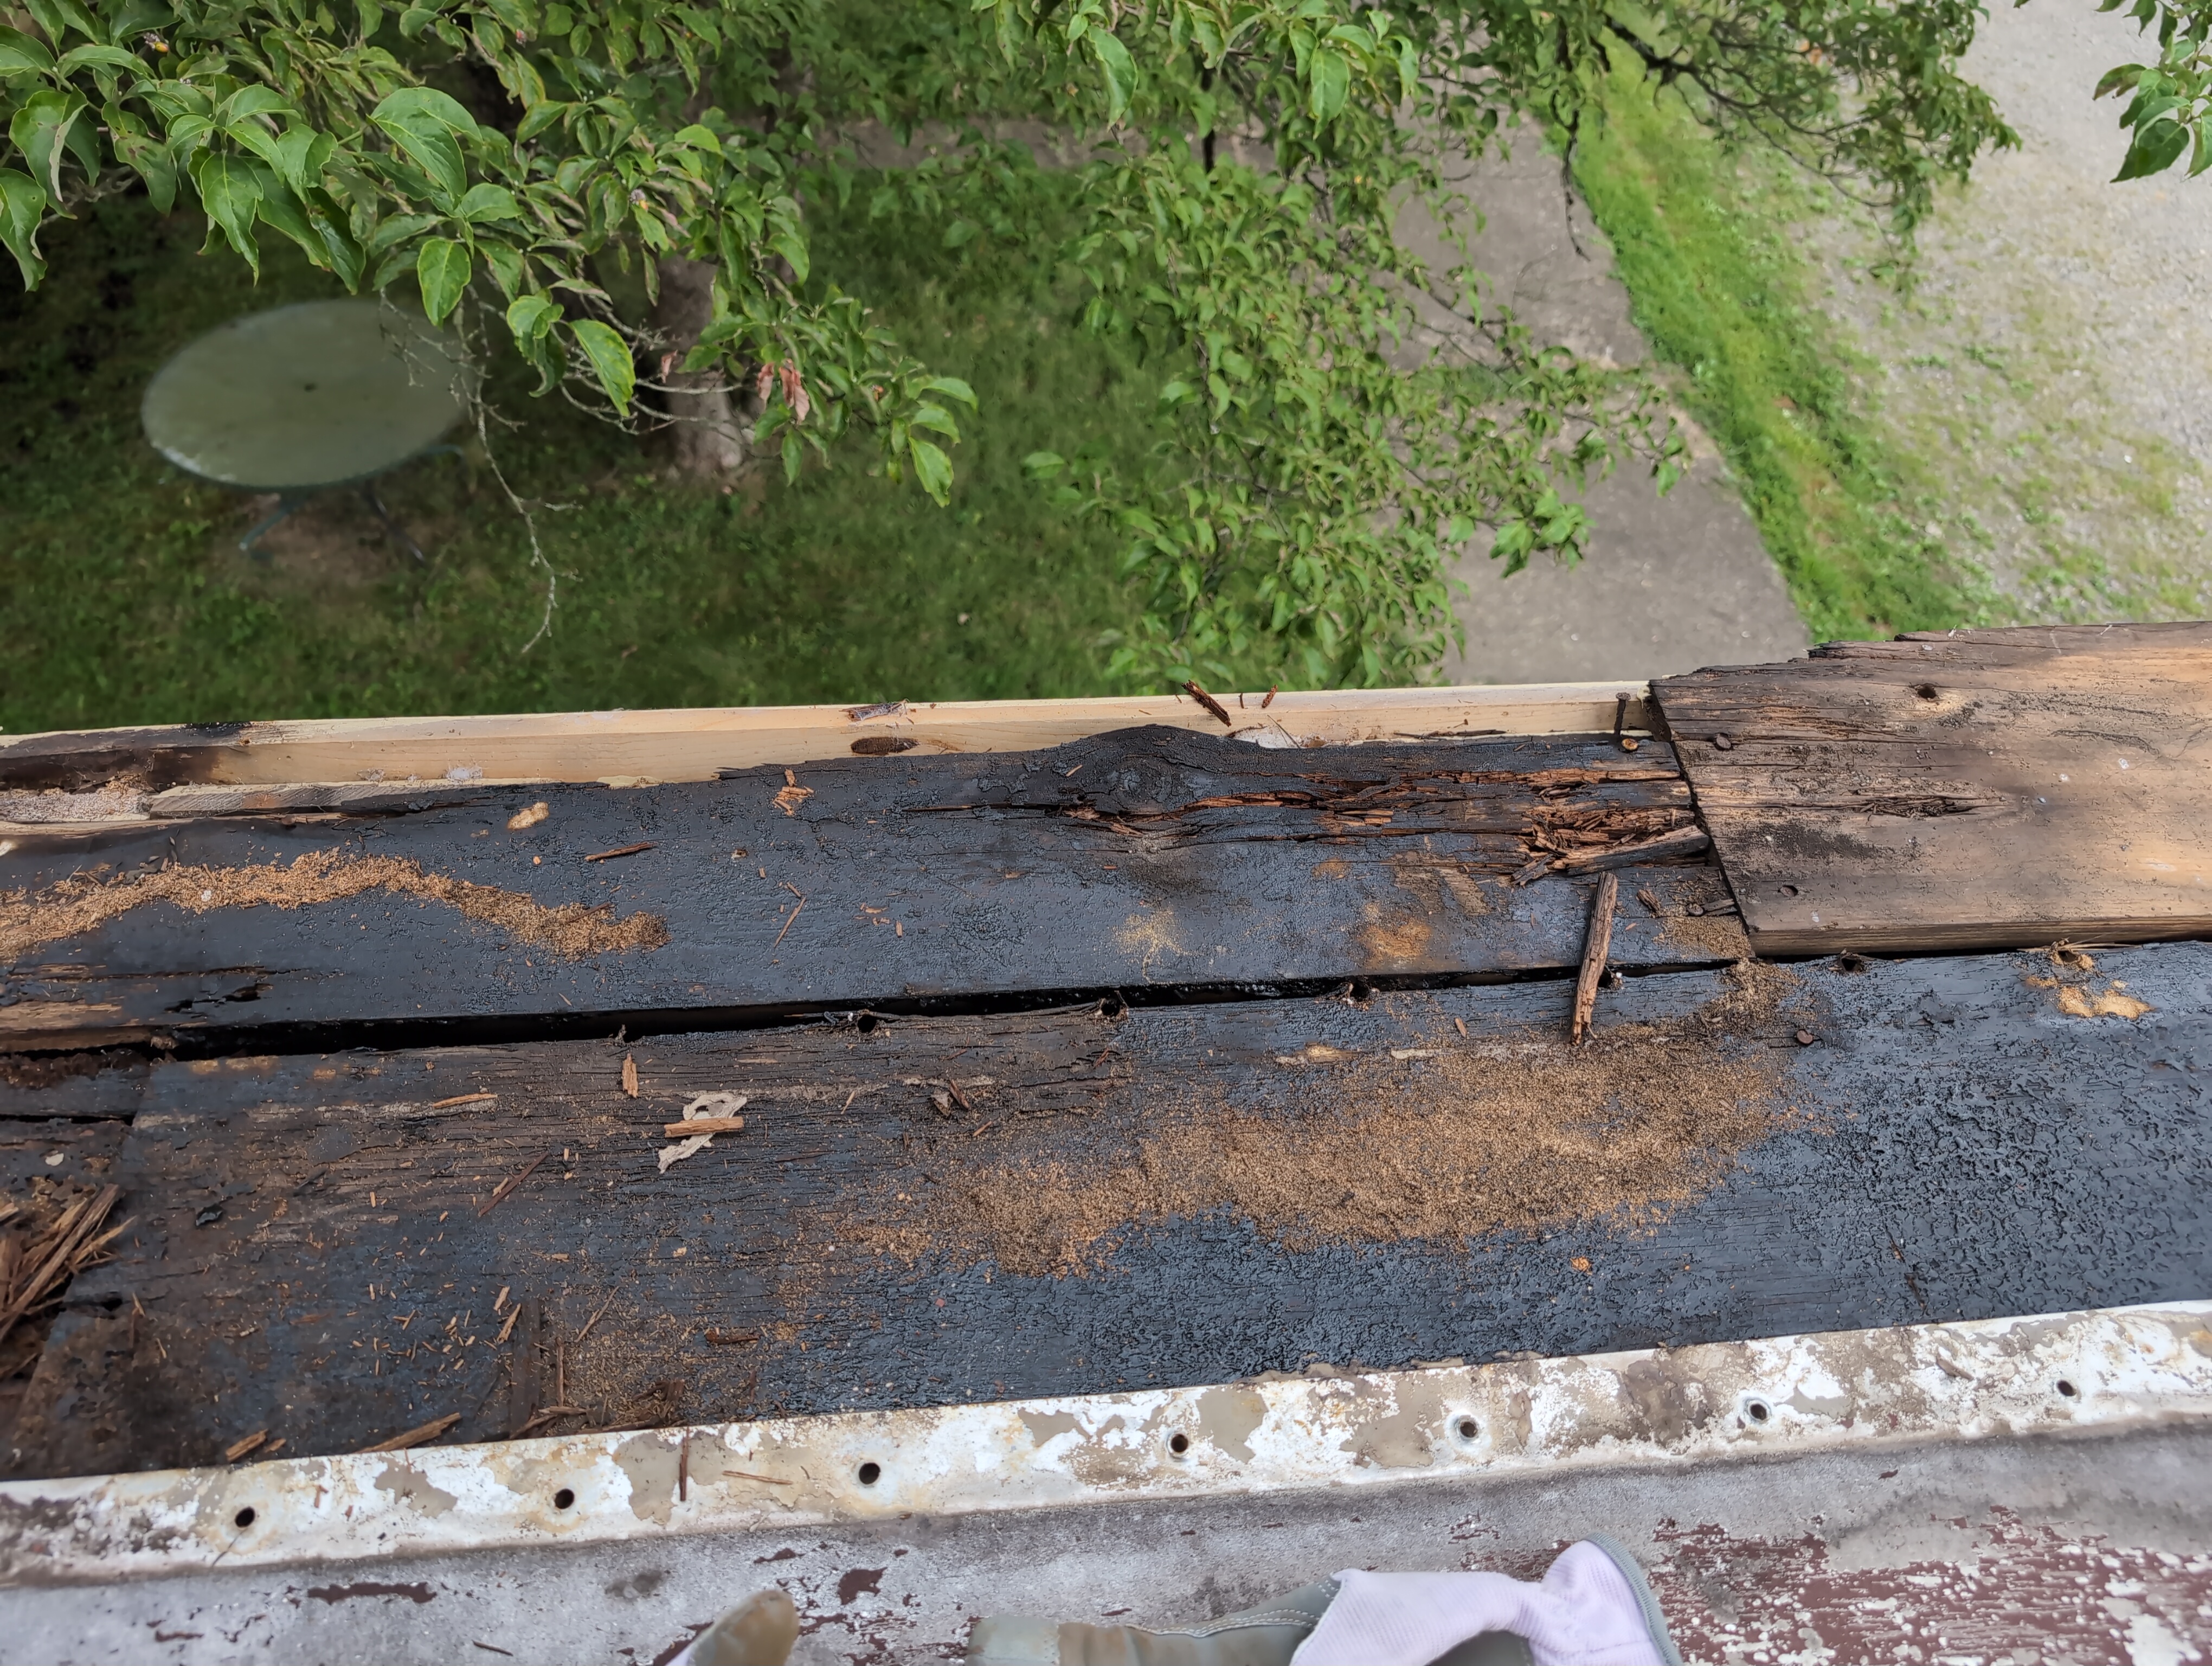
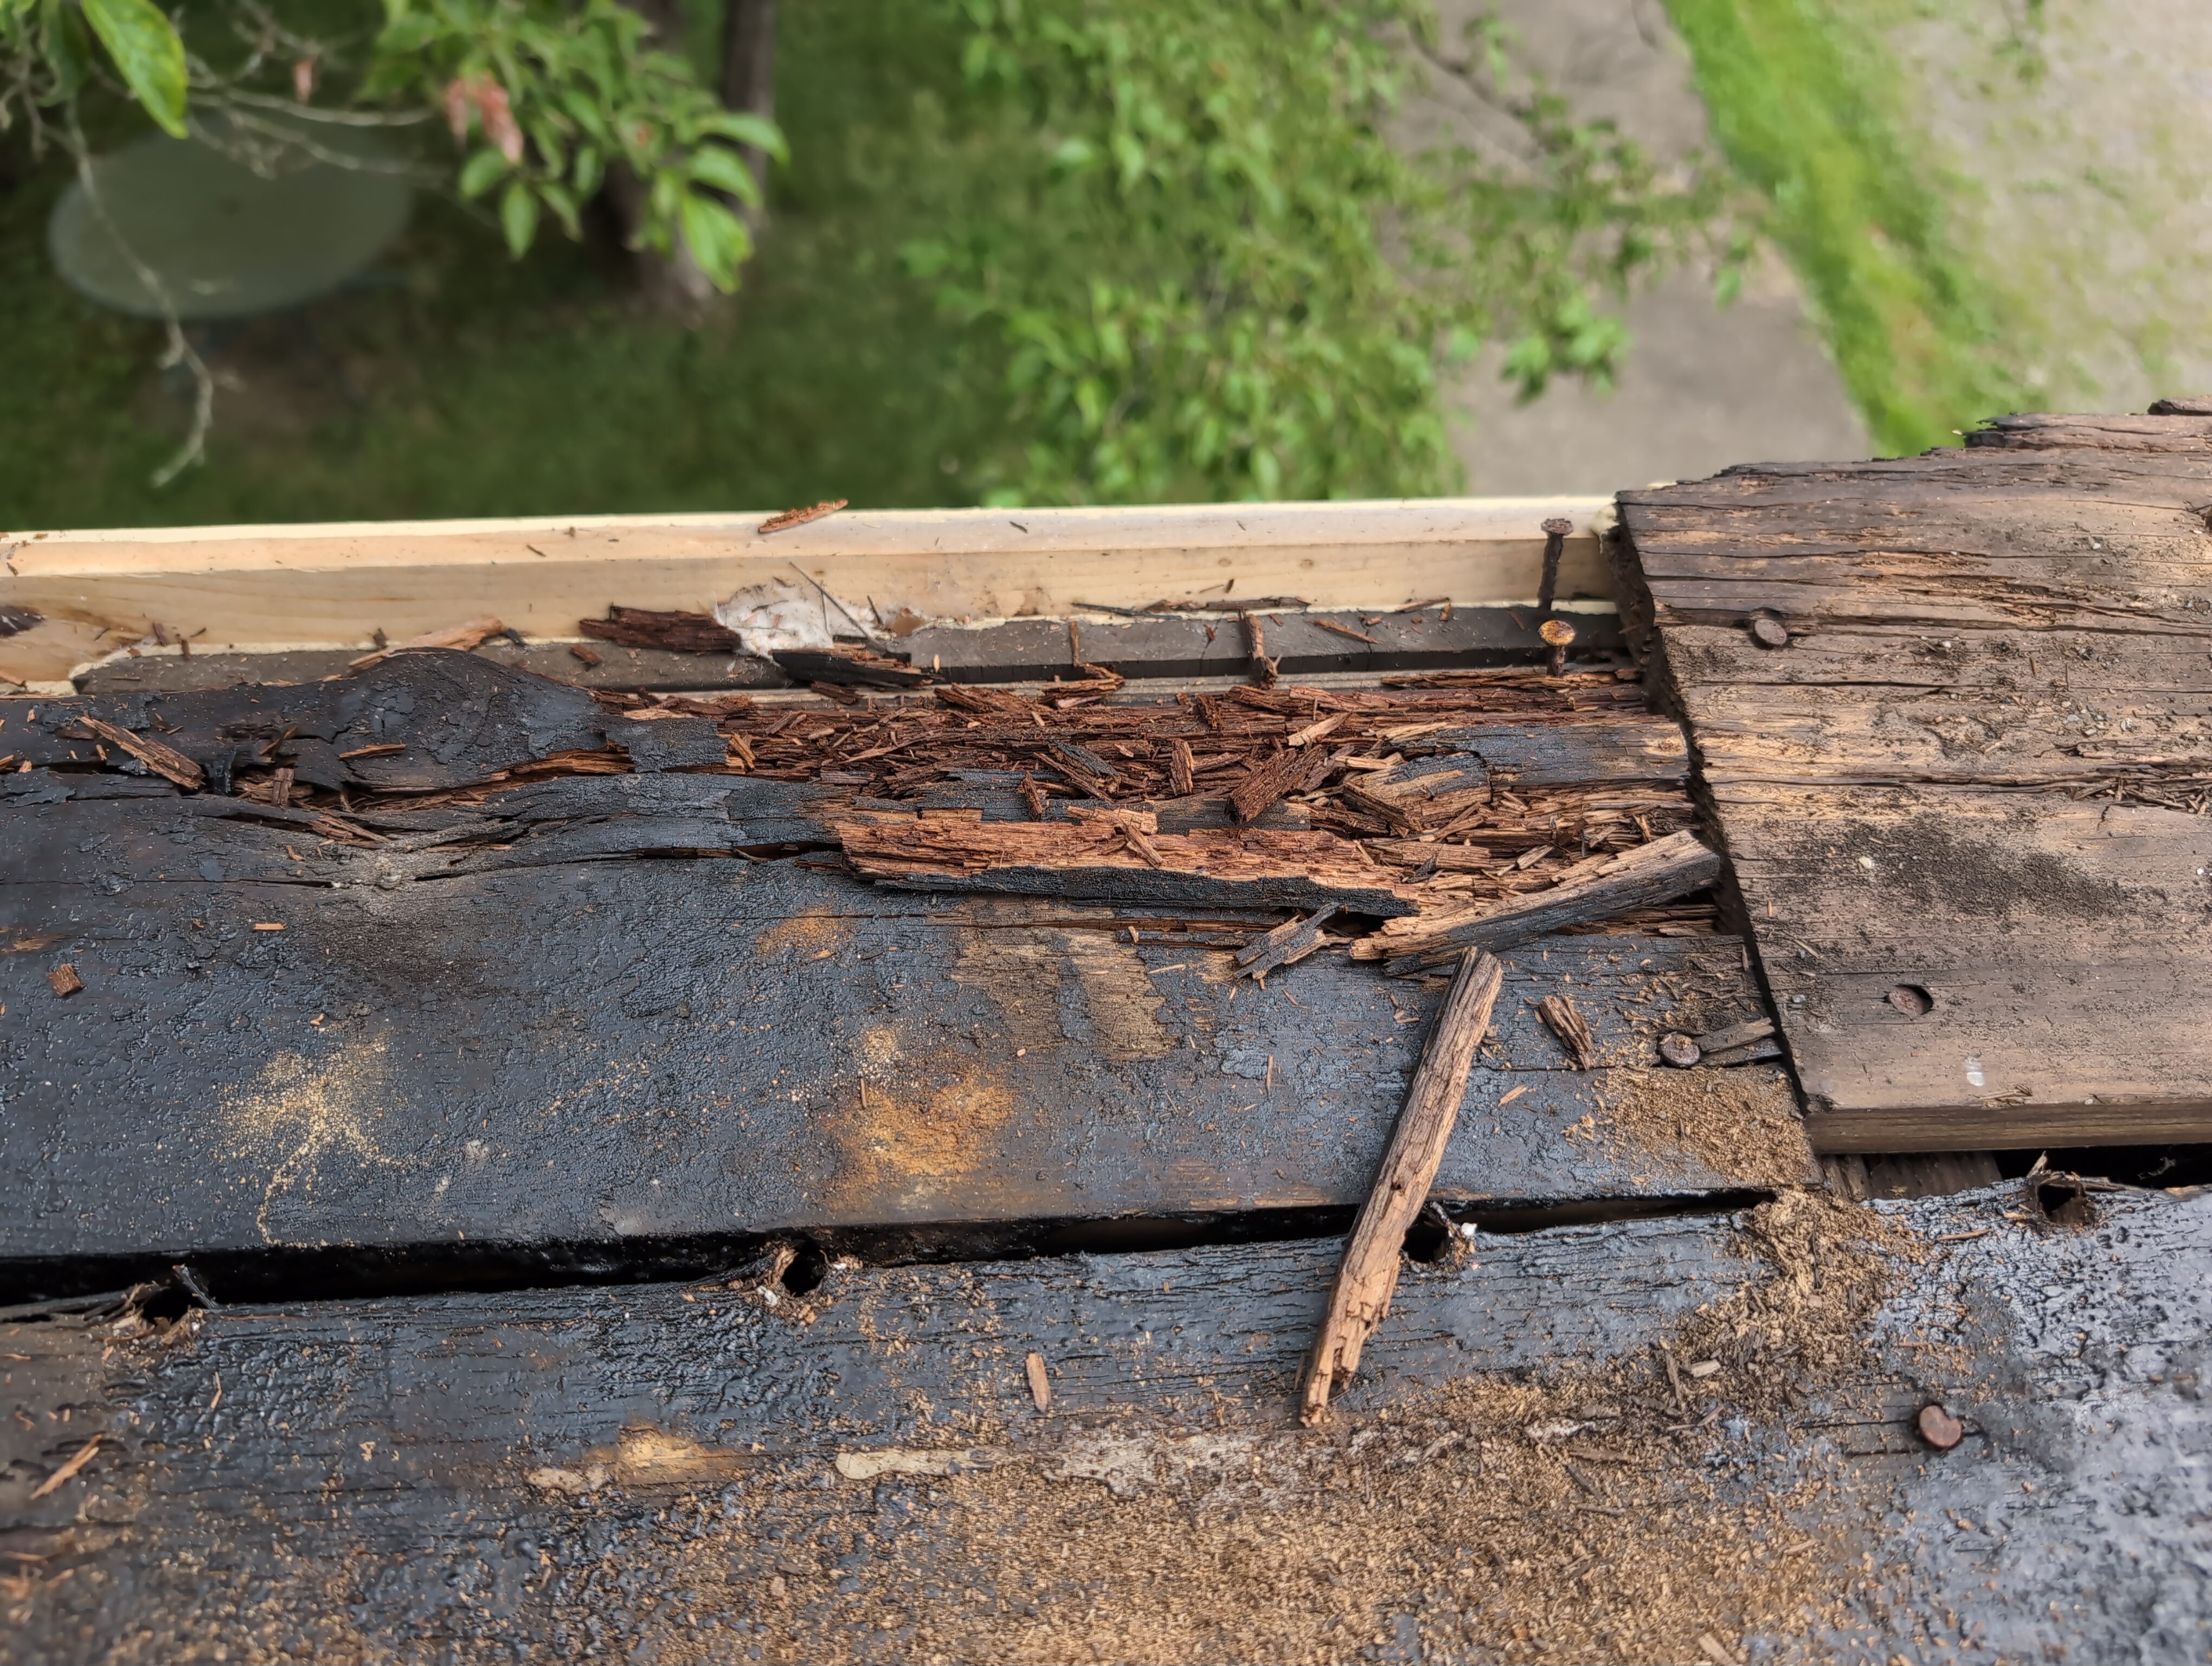 This wasn't going back together and getting patched.
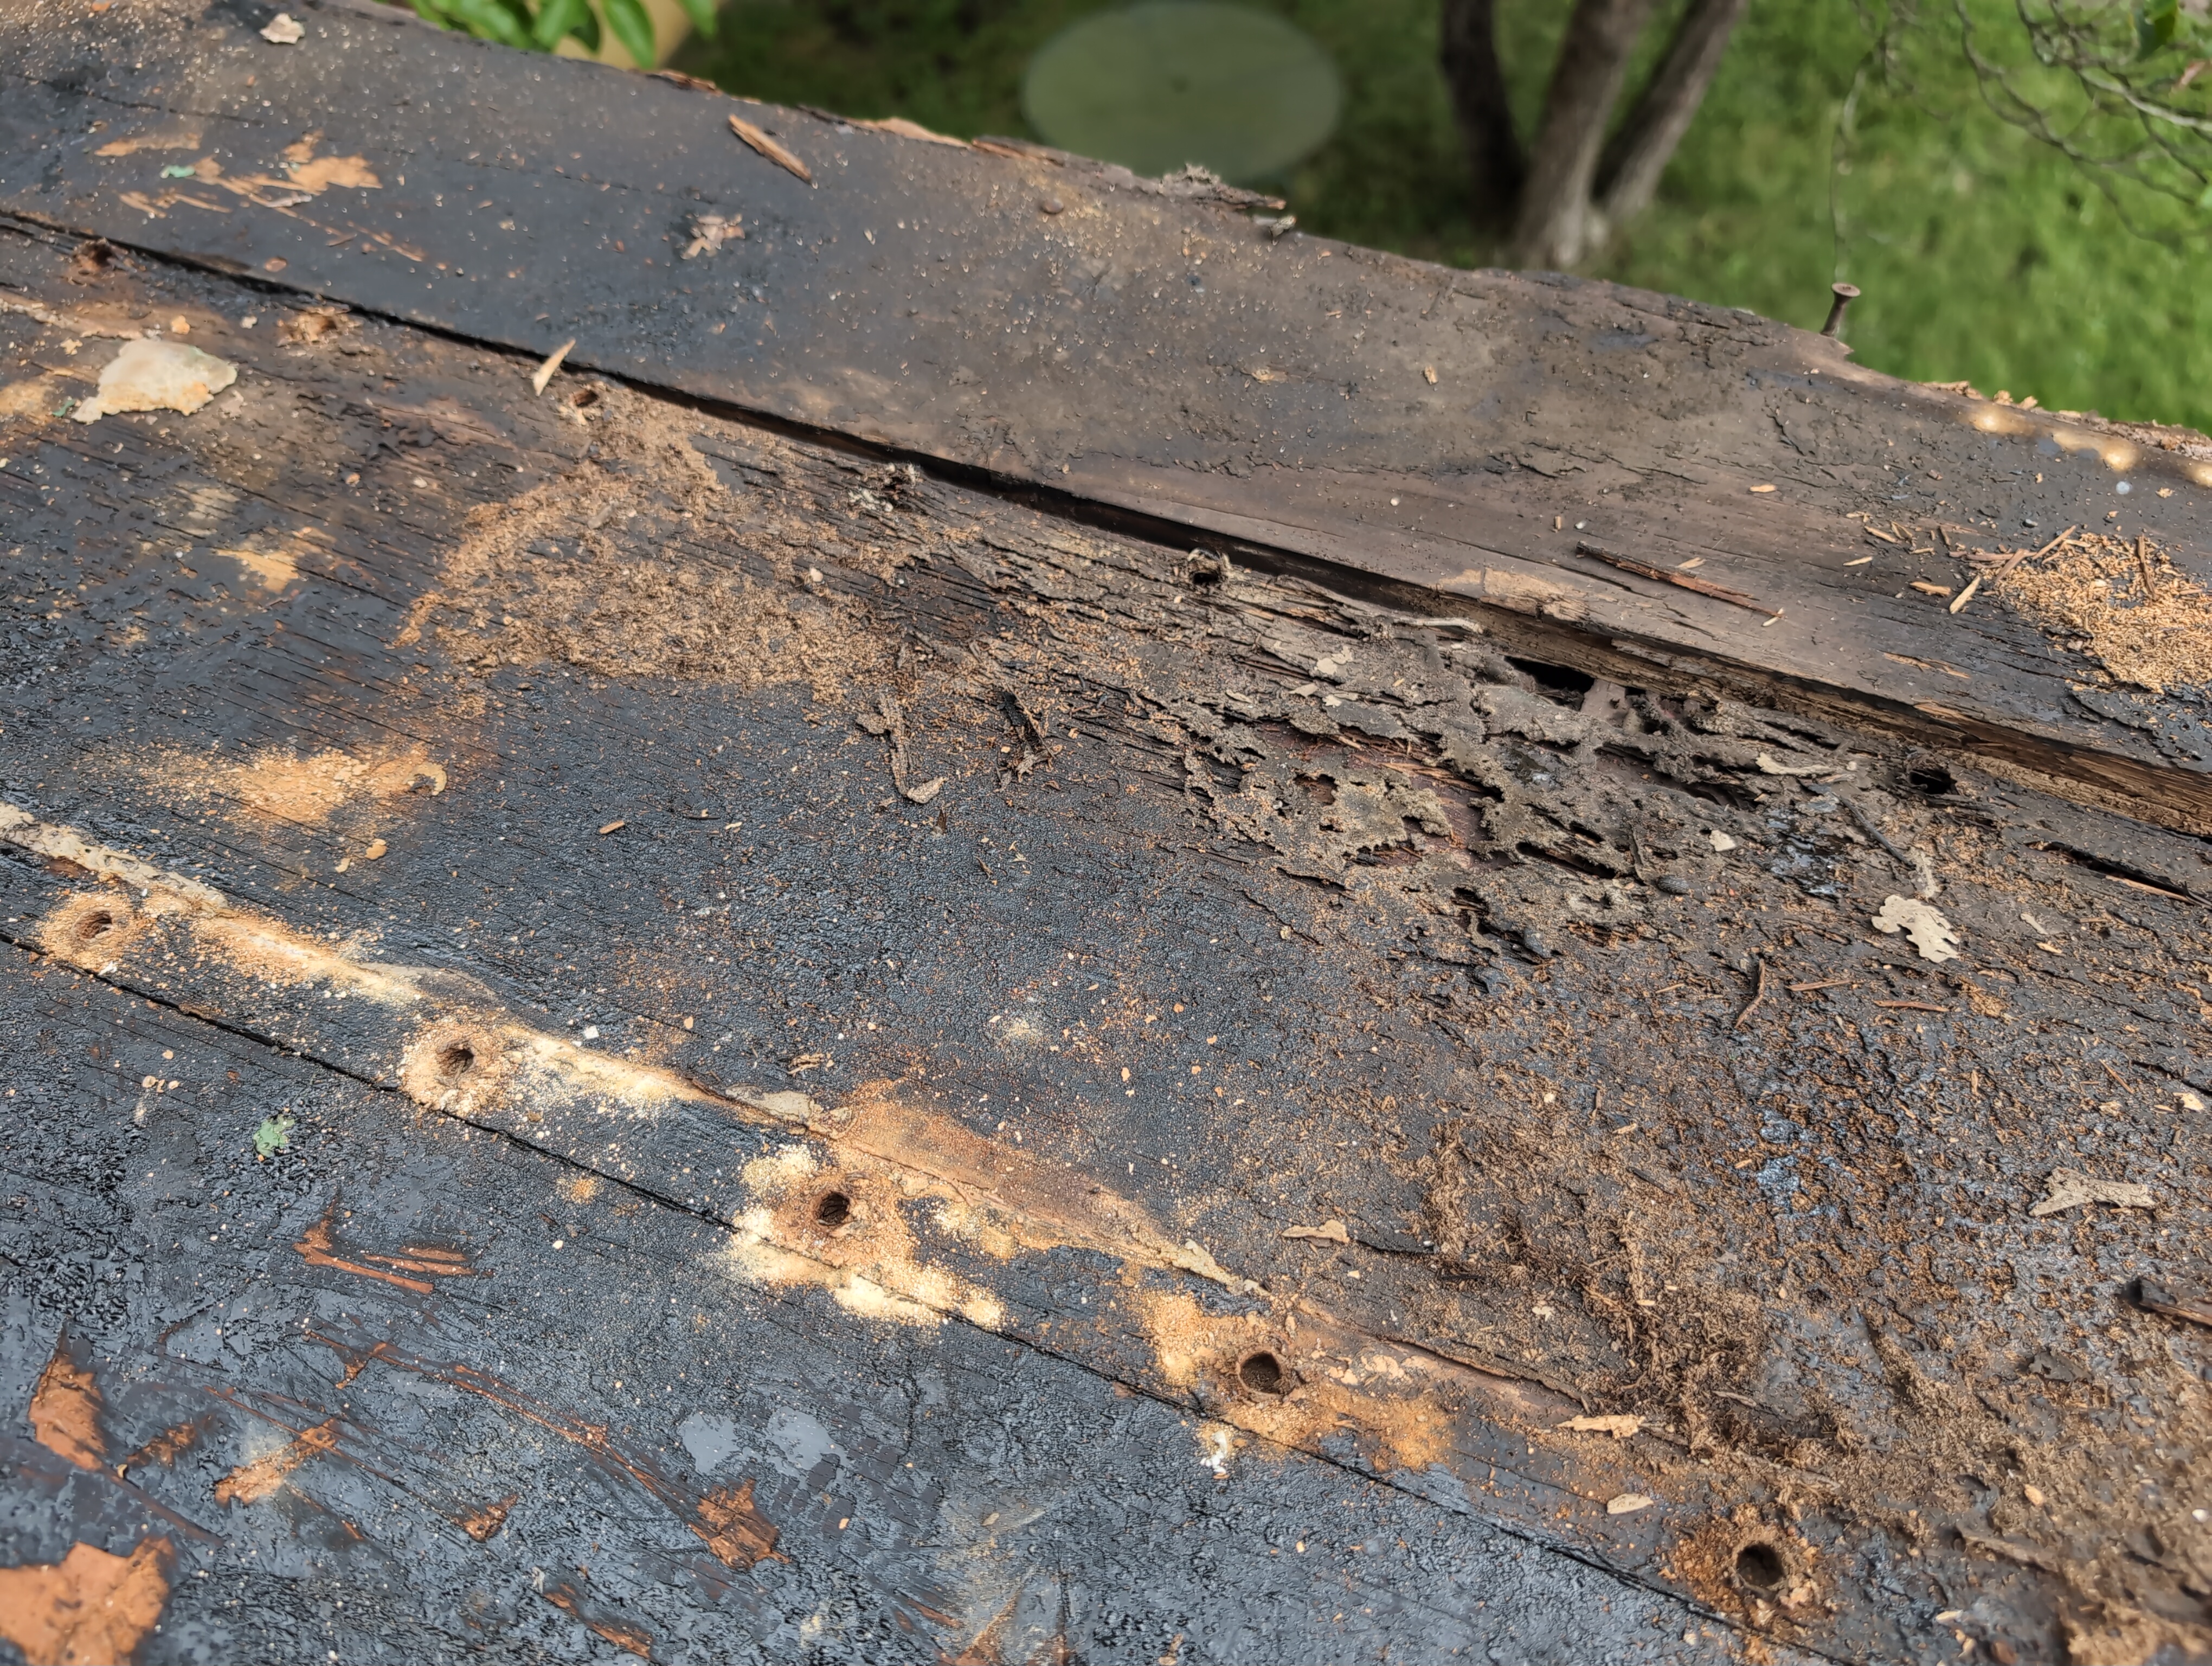
It was 10:30 in the morning, and I was officially clearing my day. I was going to pull these boards, see what I found underneath, and if it wasn't completely a lost cause, replacing the top. ... I didn't have a solid plan for what I was going to do if it was fully rotted through, but I suppose if that had been the case, it wouldn't have mattered much that another rain was coming.
I pulled the third panel off, and then I went inside and got a crowbar and a hammer.
I got very nervous when I got the first board out, and saw this crossbeam that had been supporting it. This too, came apart in my hand.
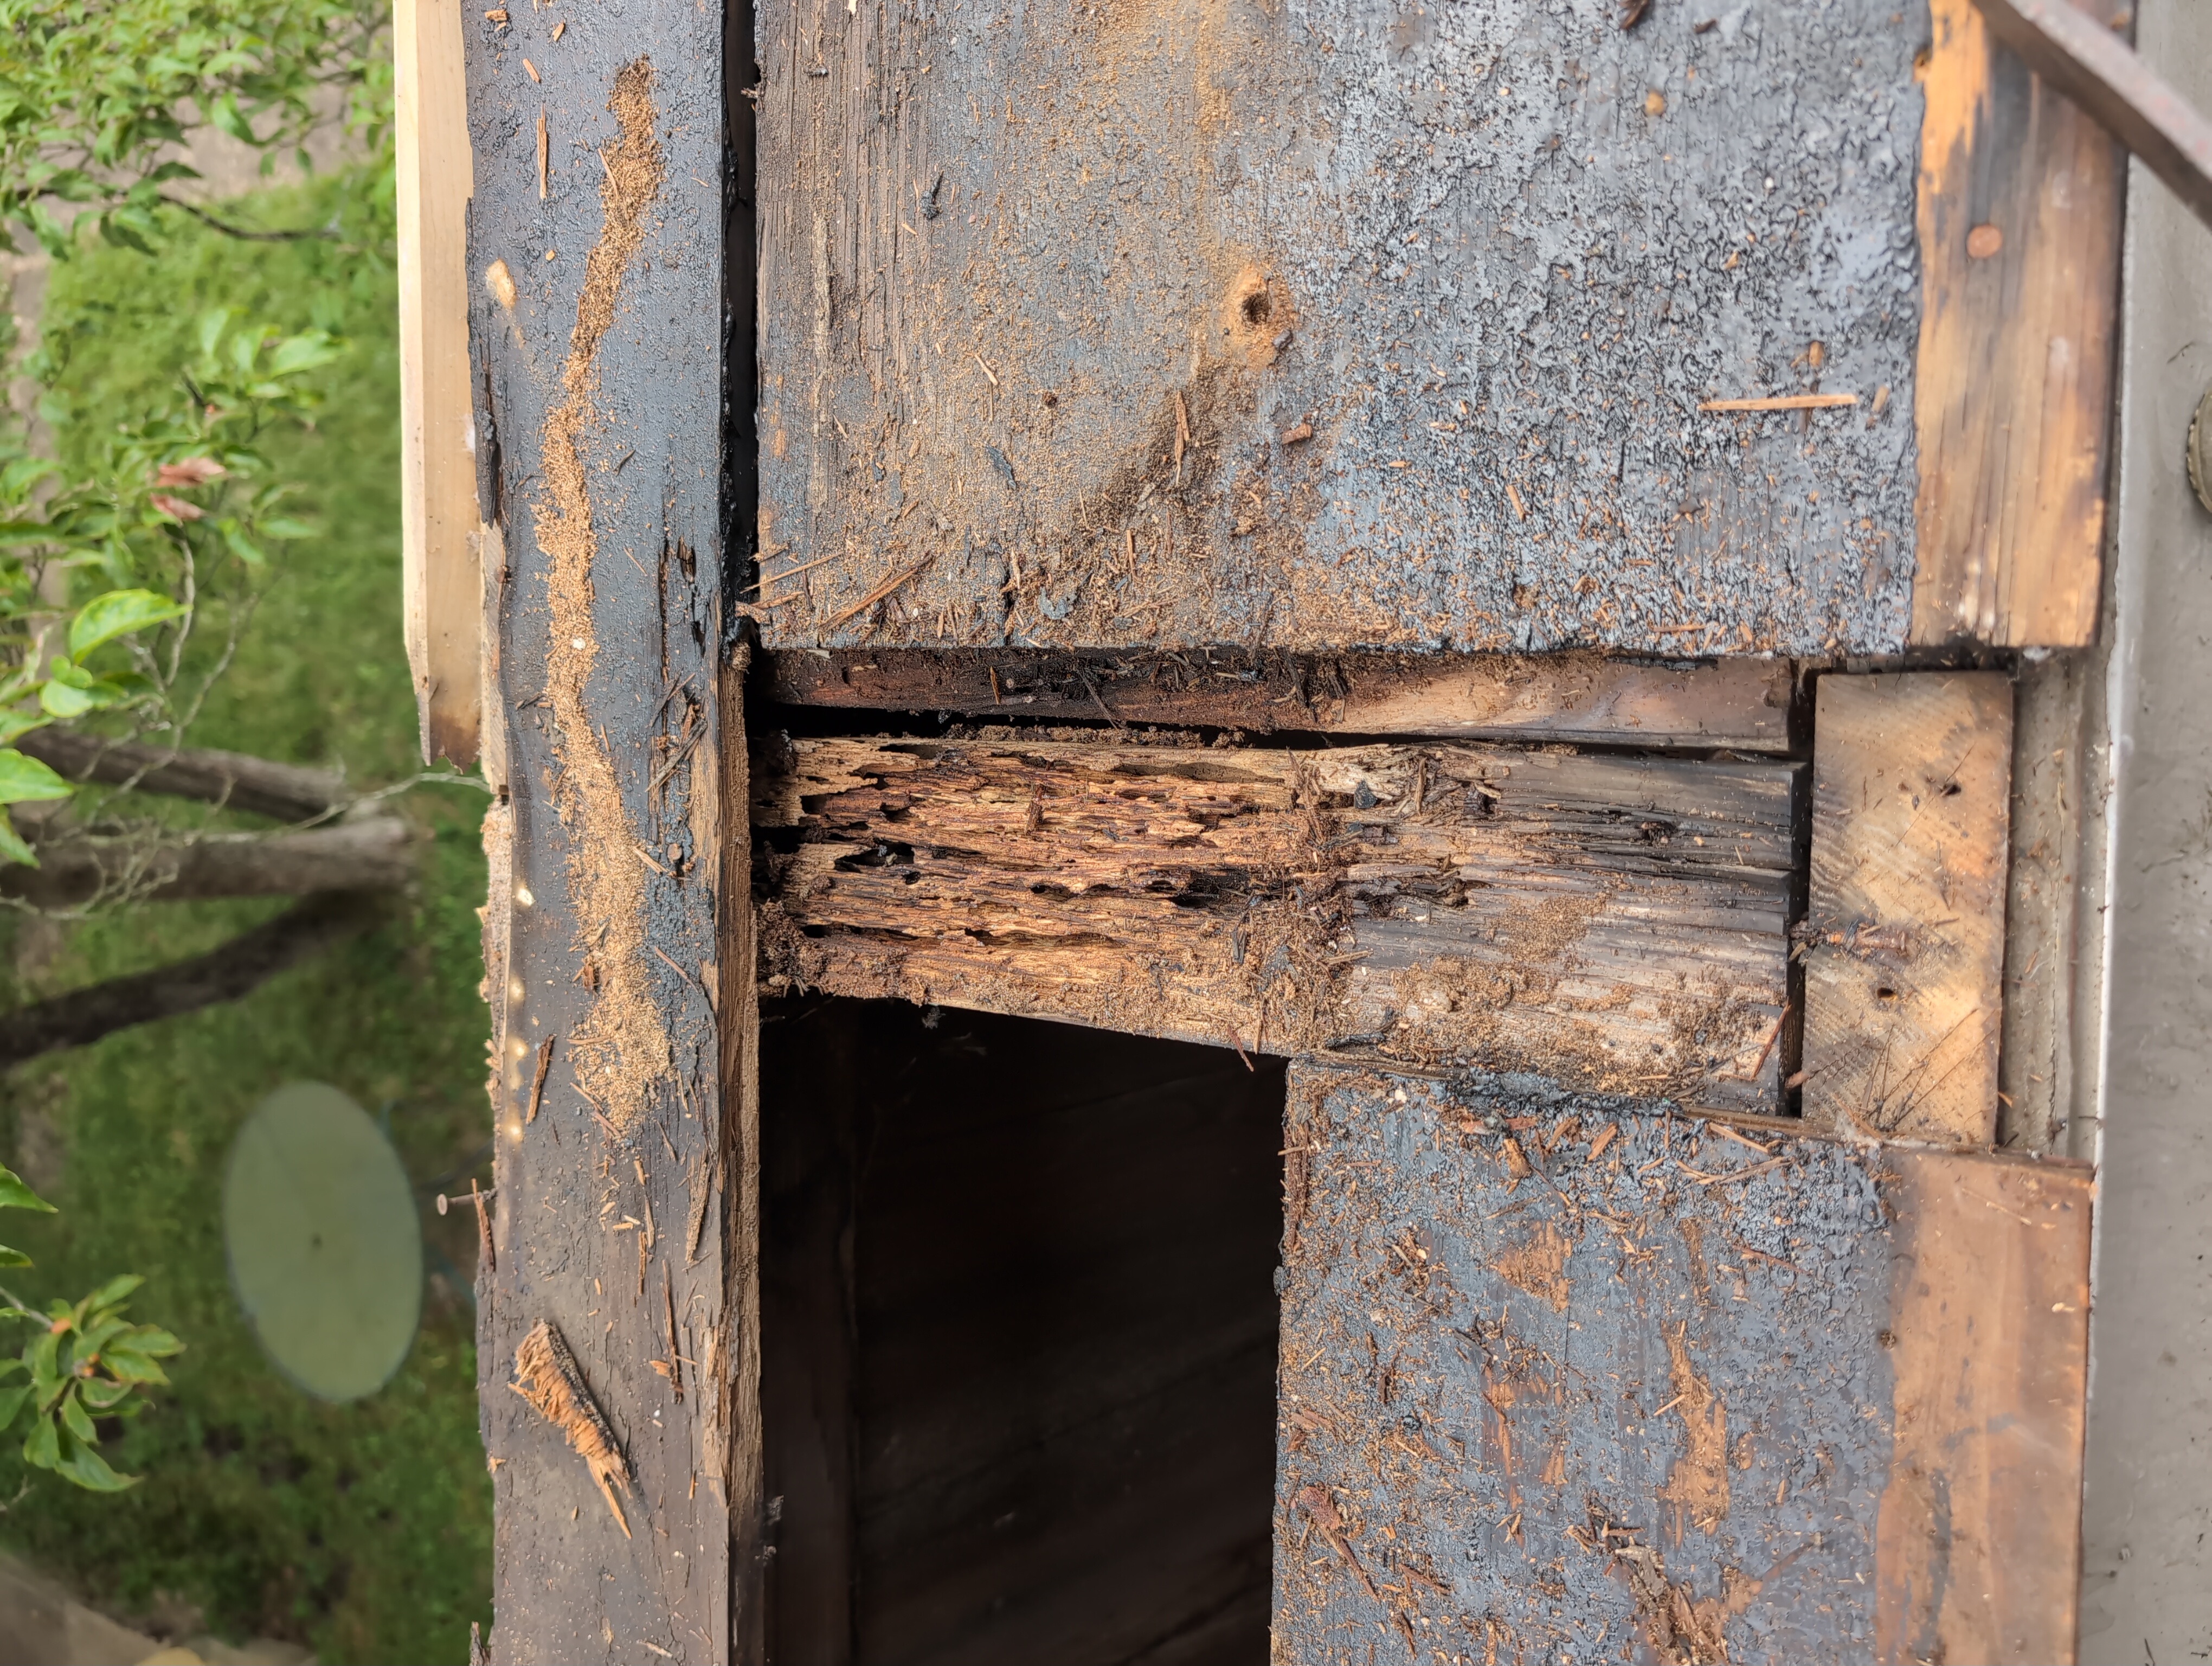
But when I looked in to the box, it was surprisingly ok-looking.
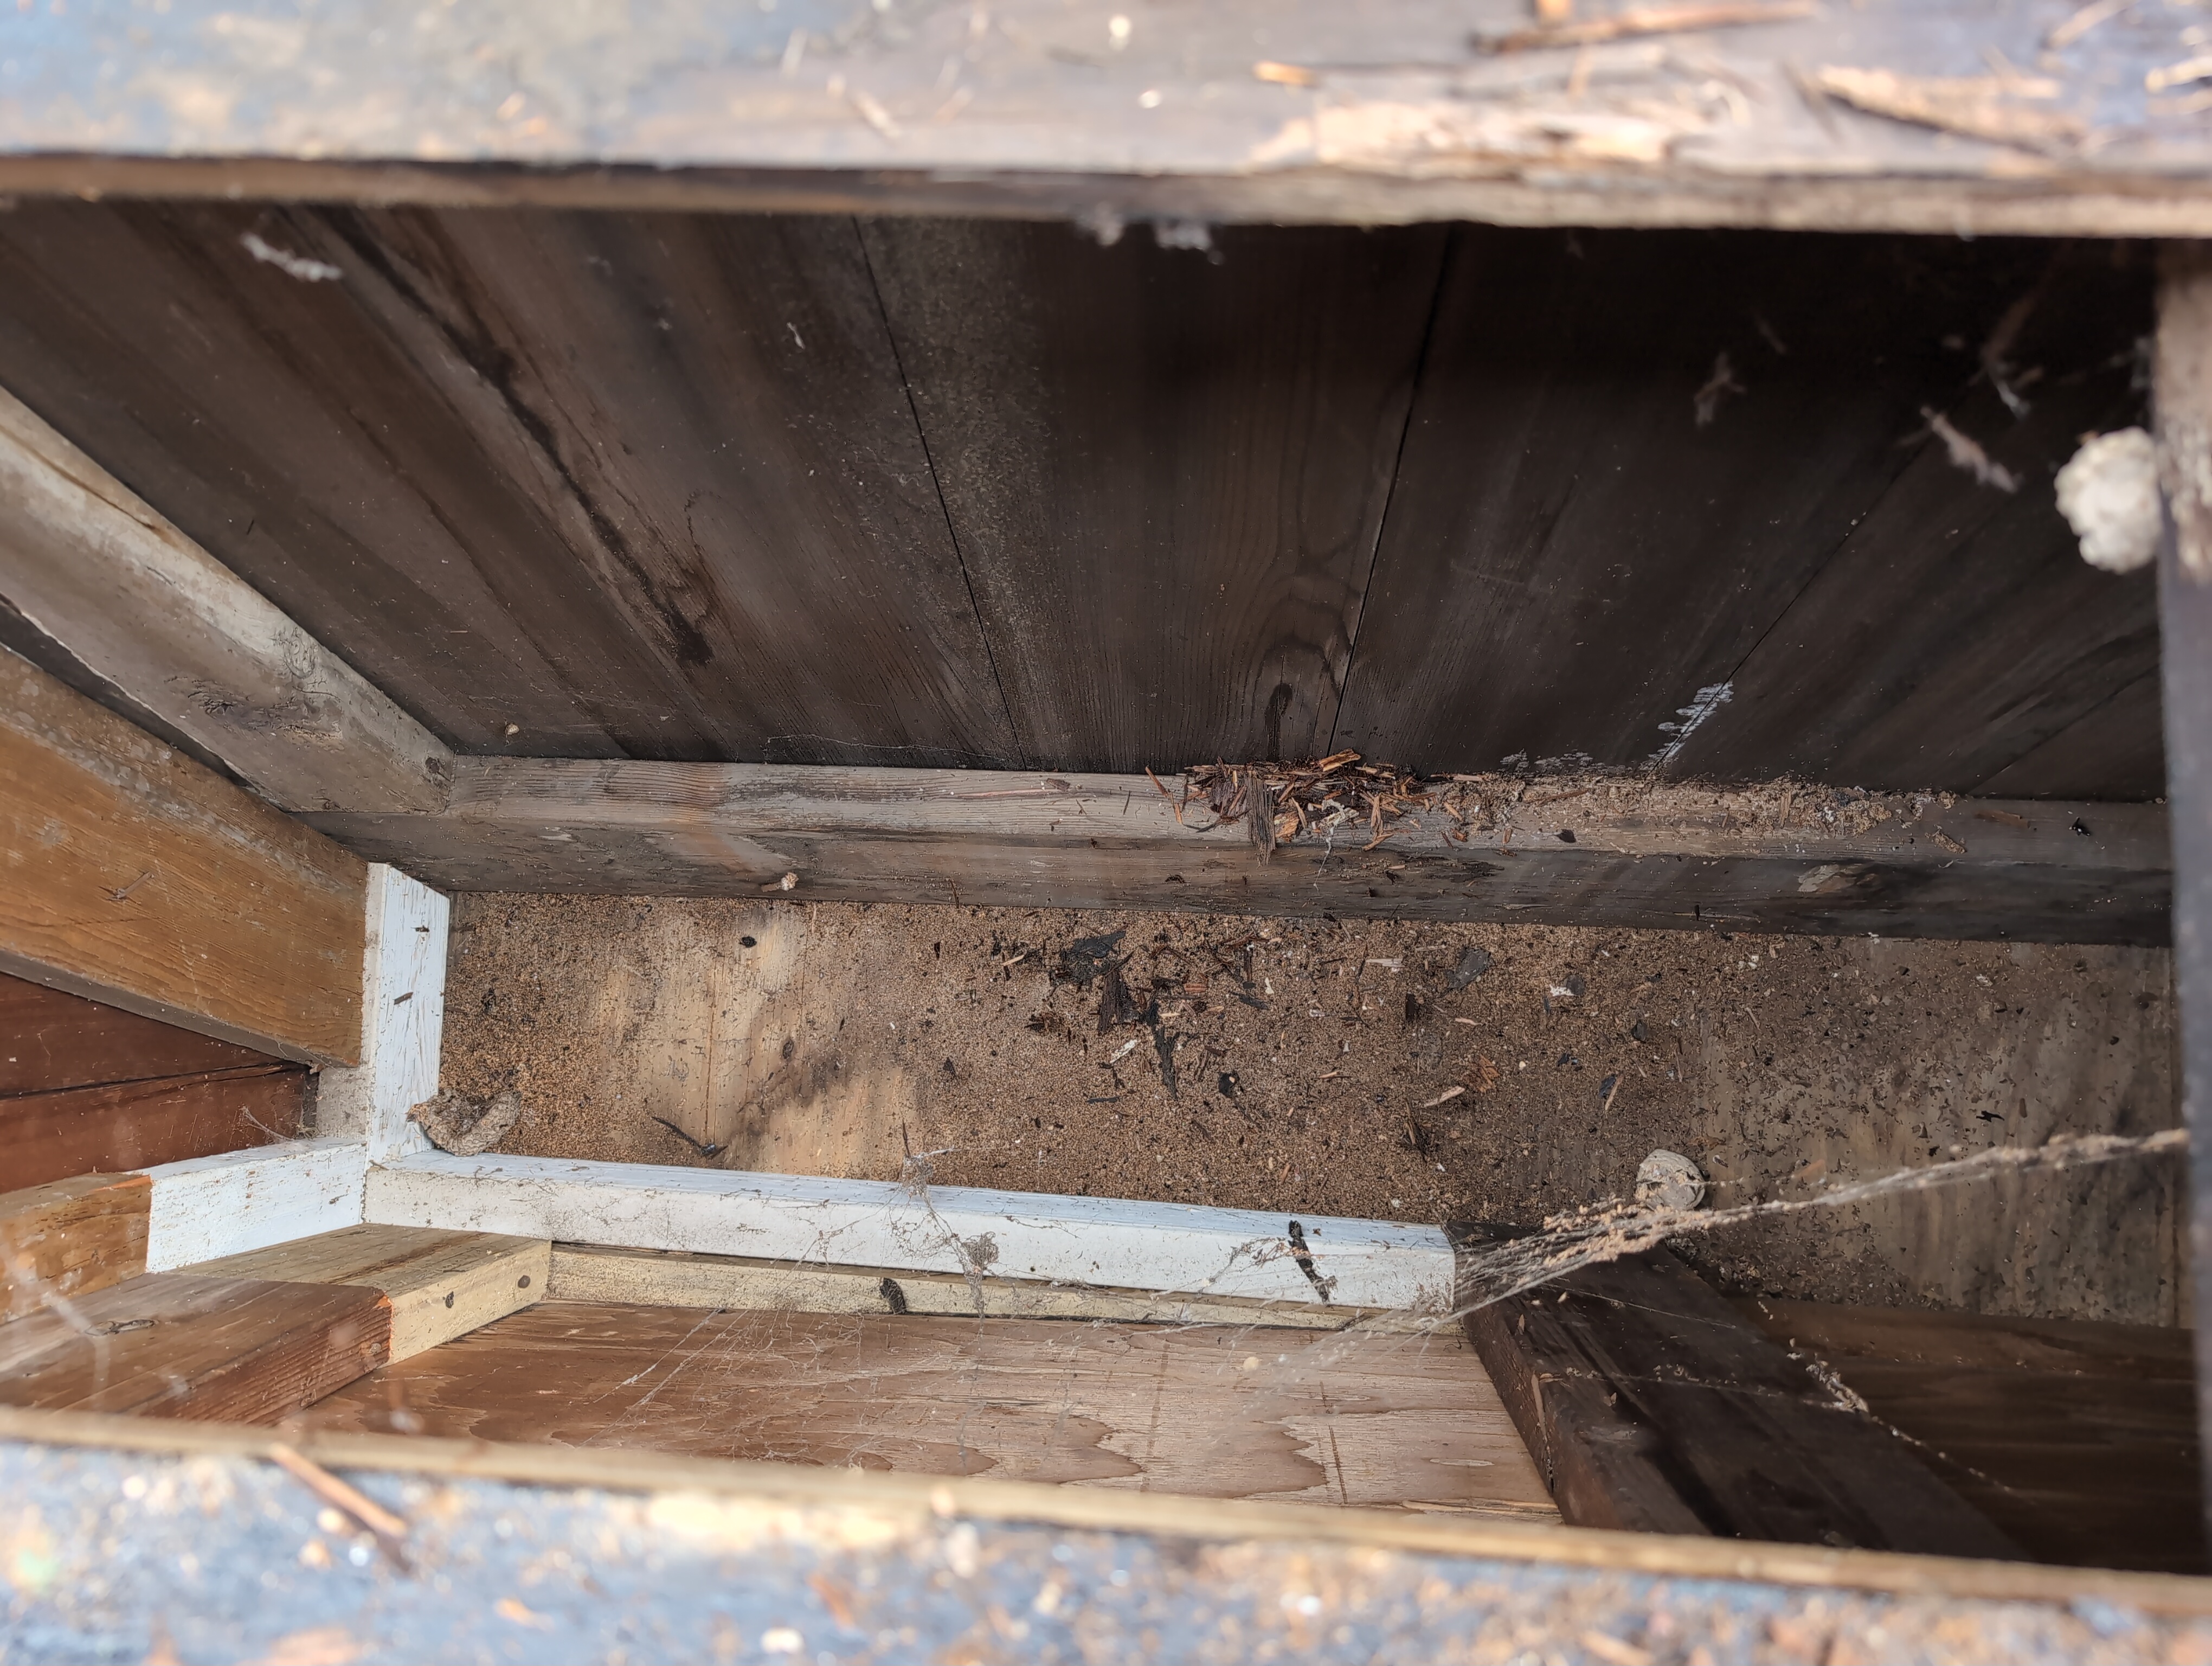
I won't say that none of this has water damage, but I do think it's reasonable to think it'll continue to stay up, provided it doesn't continue to get wet all the time.
I got most of the boards clear and then went for a supply run.
I returned home with a couple of 2'x4' 3/4" plywood sheets, a discount 2"x4", a few rolls of brown/white aluminum flashing, a box of roofing nails, a sealing adhesive that's supposed to be for boats, a rubberizing spray that was marketed for roofing, bits and bobs for a couple of other projects, and a new toy! .. tool, yes. A new tool! One of those oscillating multitools, I bought one with batteries compatible with our string trimmer, that vendor lock-in is real for cordless tools. It's been on our radar as a potential investment for a while, and looking at the nailed construction of this particular project, I knew I'd need one to get everything out.
After a lunch break, I headed back out again. Armed with my new tool, and a new-to-me tool, a battery powered circular saw the house recently inherited, and headed back up.
I cut back the rotten halves of the boards I hadn't pulled earlier. I had left them in place for two reasons. One, because I was pretty sure that only part of the boards in question had rotted out, and two, because the ends of those boards were tucked under the metal siding that ran along the side of the roof where the wasps were building. If I could avoid disturbing that siding, and therefor the wasps, I was going to. This took longer than I would have liked, because the circular saw is an old cordless tool with old batteries (really, these have been phased out and aren't being sold anymore because they're not as safe a design), and the batteries don't hold as much charge as they should and I zipped through them.
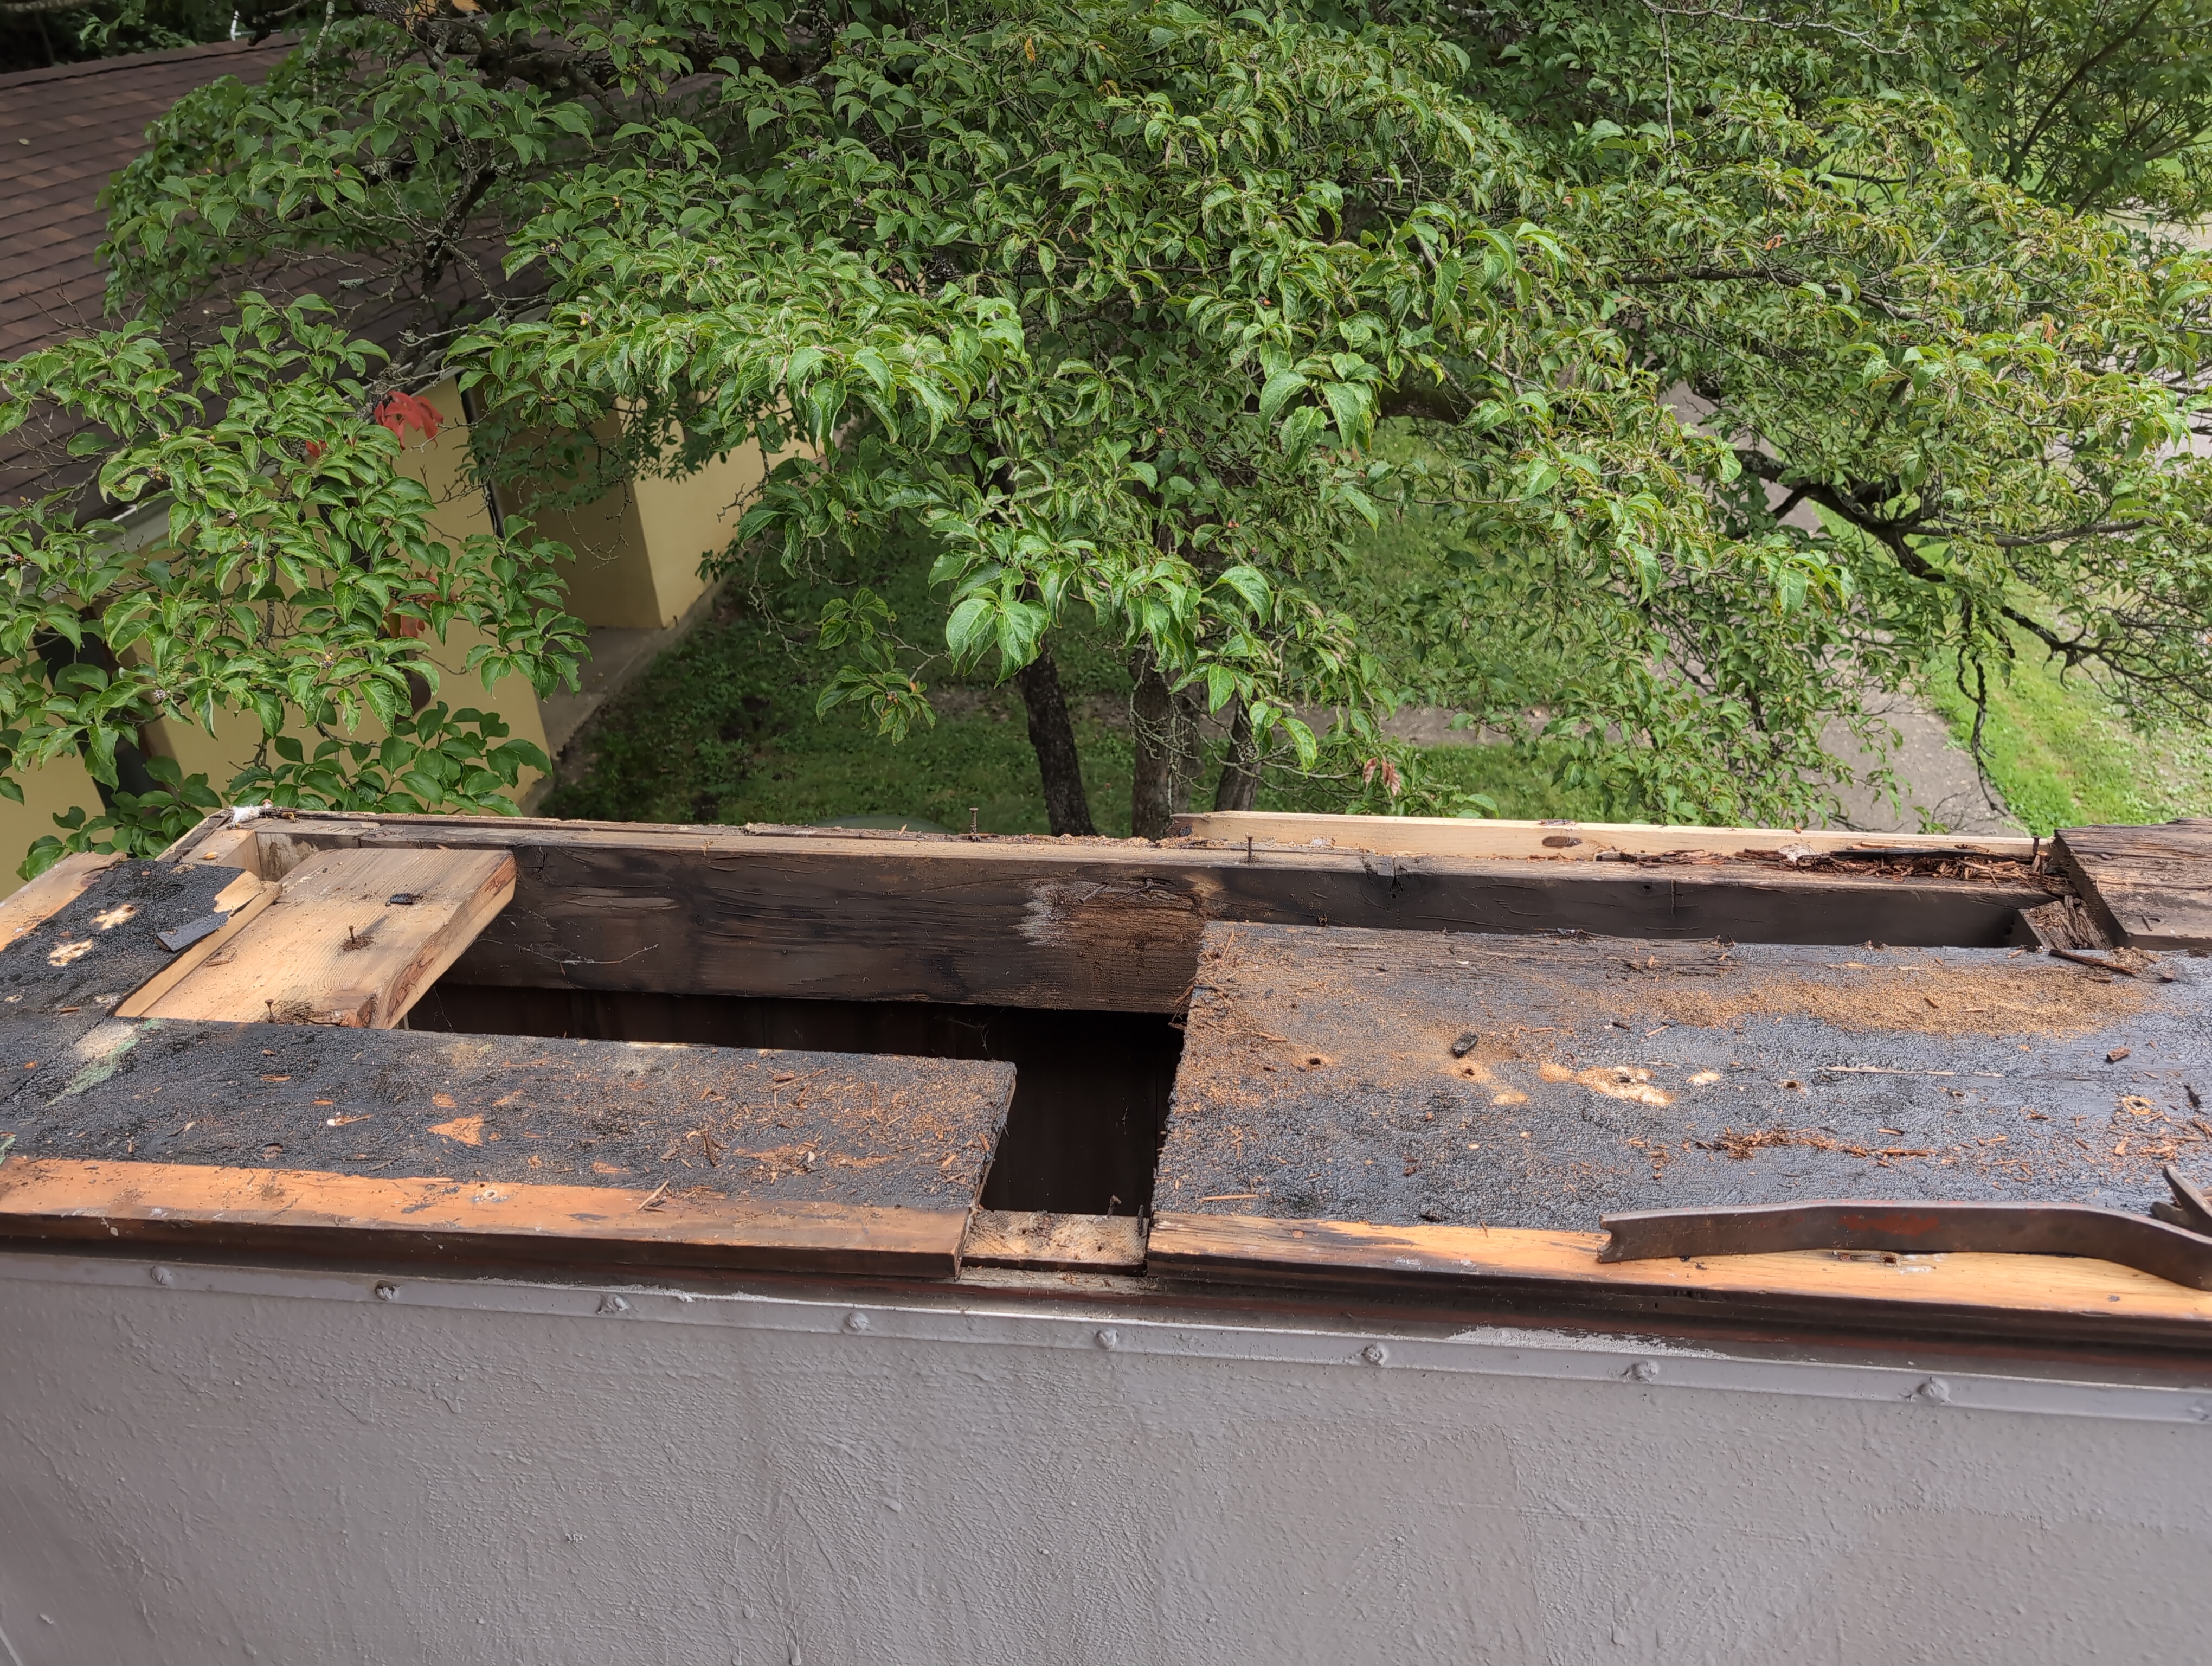
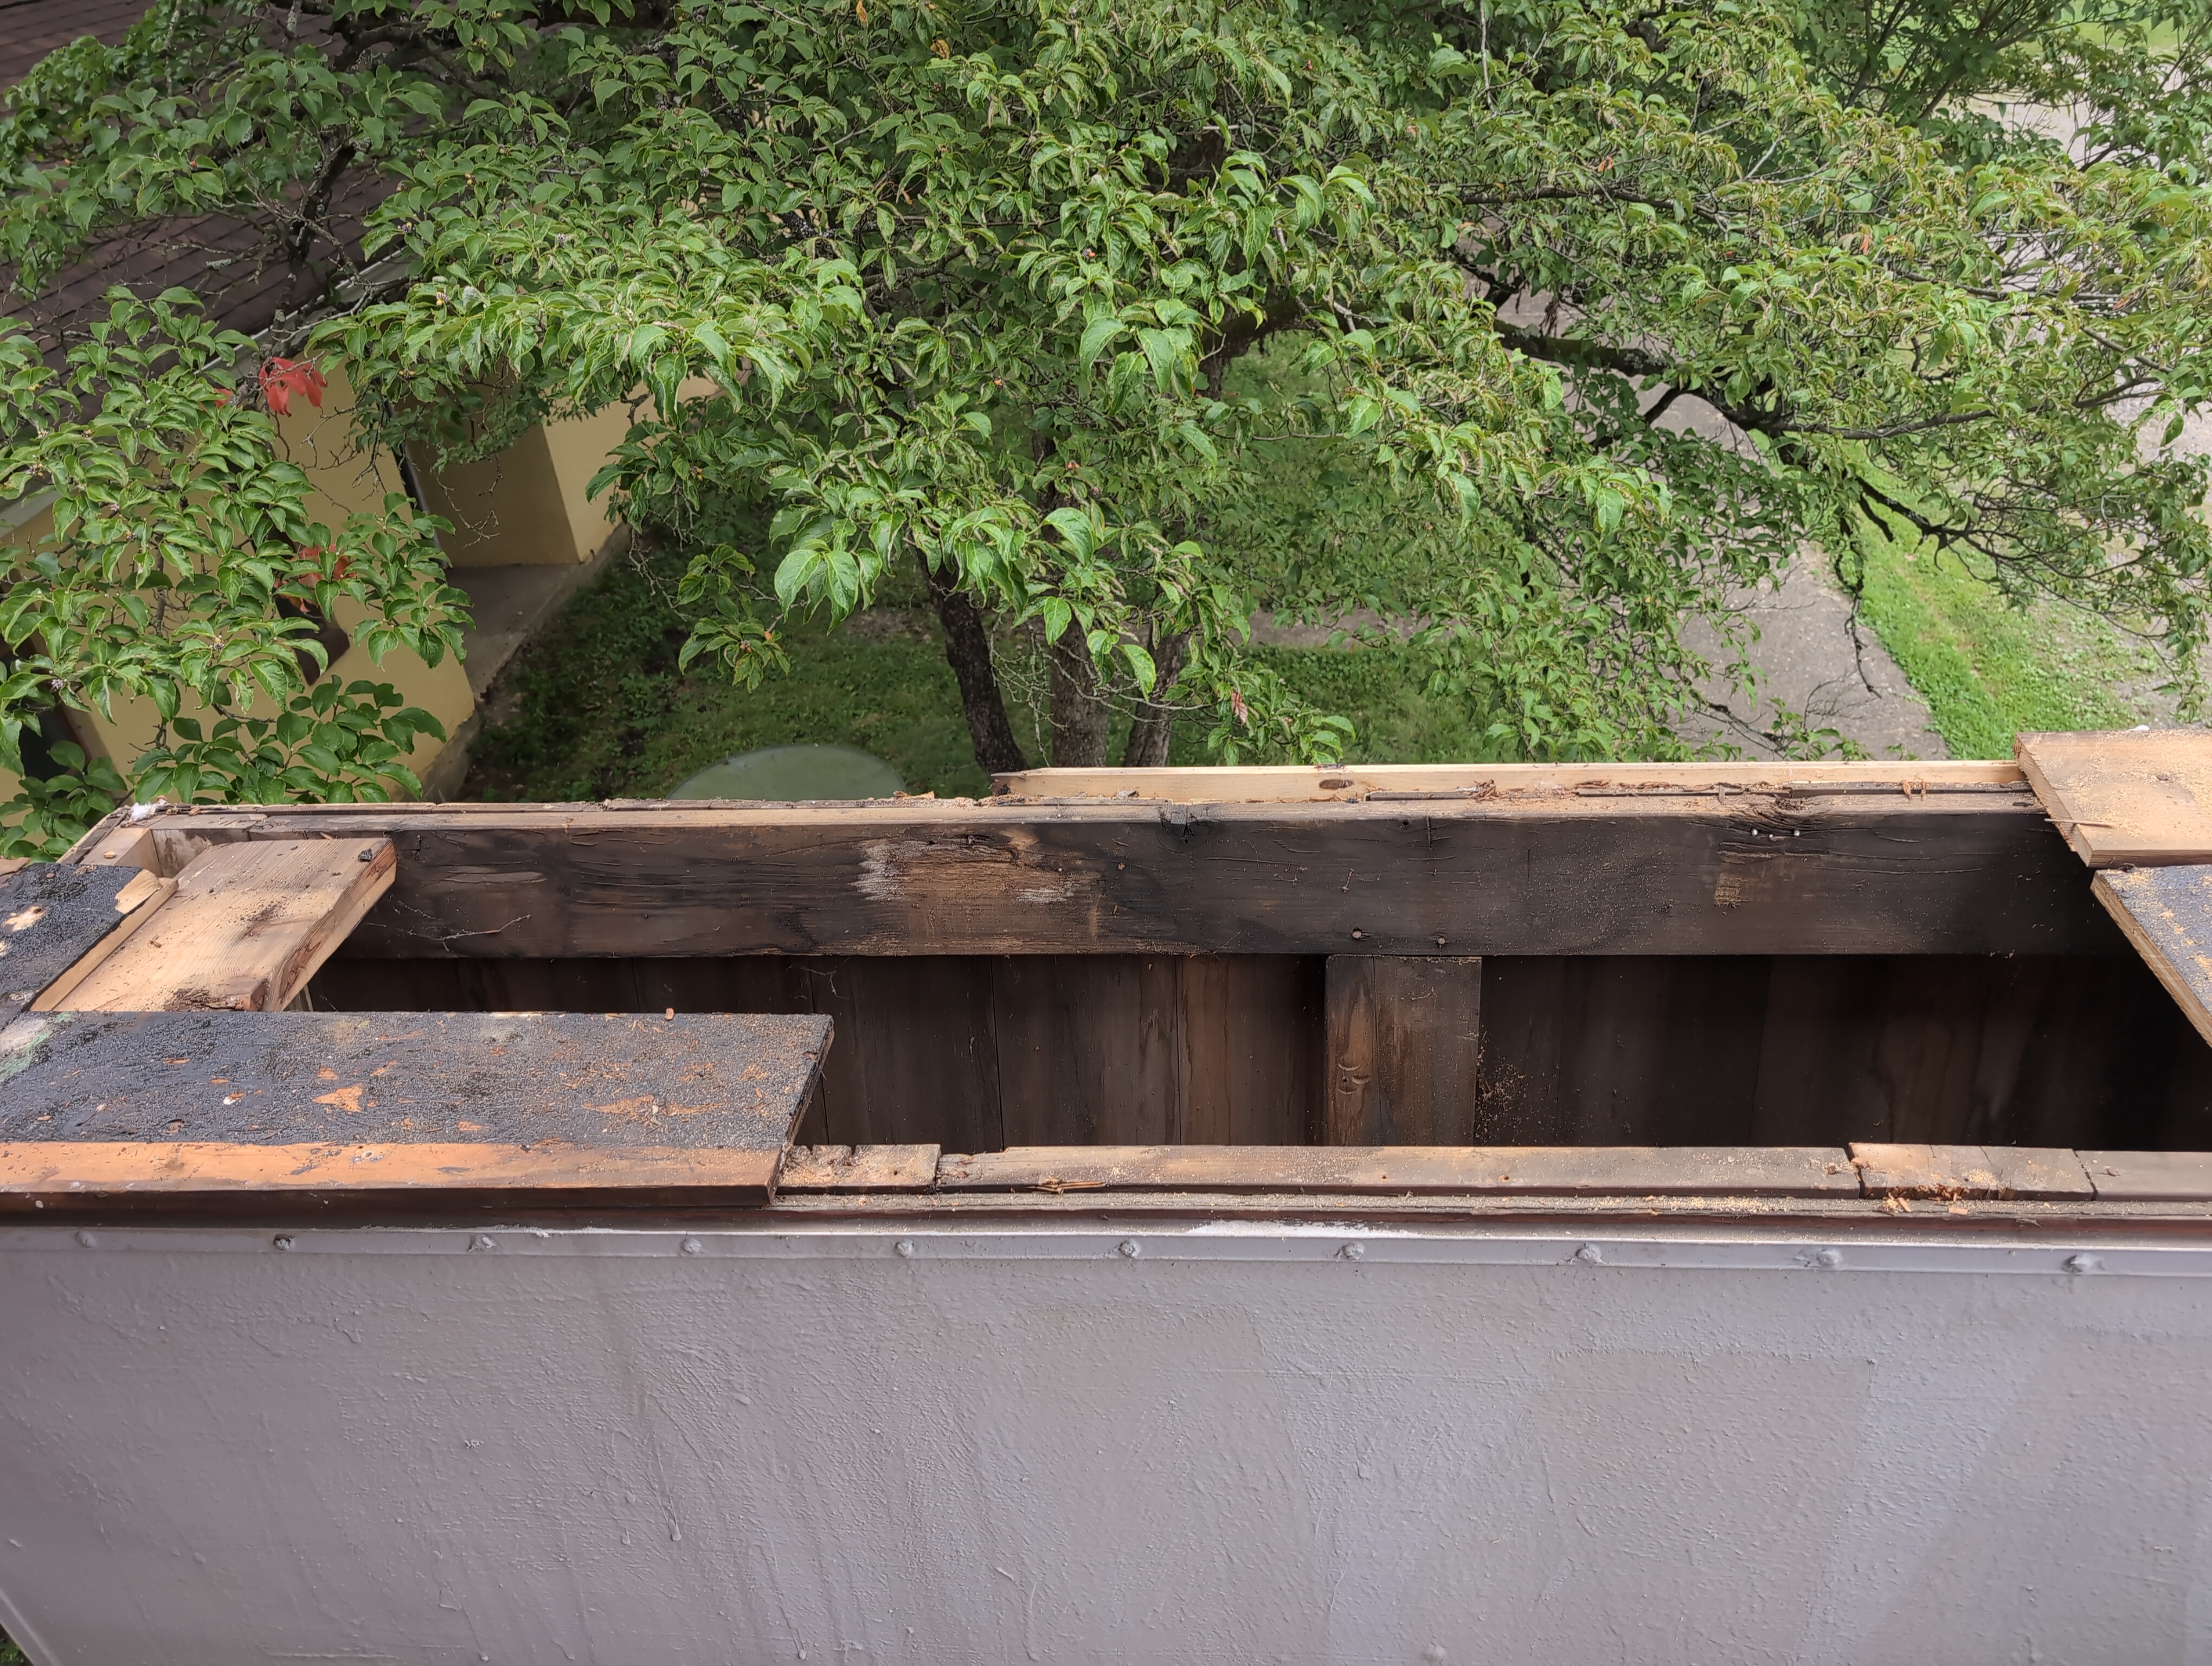
I found yet another rotten crossbeam under the bad parts, which I did have to use the new toy to get free. I found the tool to be annoyingly loud and buzzy, and to be very limited in it's ability to cut wood. It takes longer to cut into things than I'd been lead to believe (thanks Youtubers), and struggles with anything that has a significant wobble to it. That said, it works in places and situations where basically no other tool does, so I'm happy with it.
Next was using the 2x4 to replace all those rotten crossbeams! This was complicated a bit by the fact that what I'm going to call the "far wall" in these pictures is at a bit of an angle. And an inconsistent one at that.
But I have both a new-to-me power miter saw, and some long deck screws. I took this one photo of the first one I got seated into place well, but didn't think to photograph the ones that I forced to work.
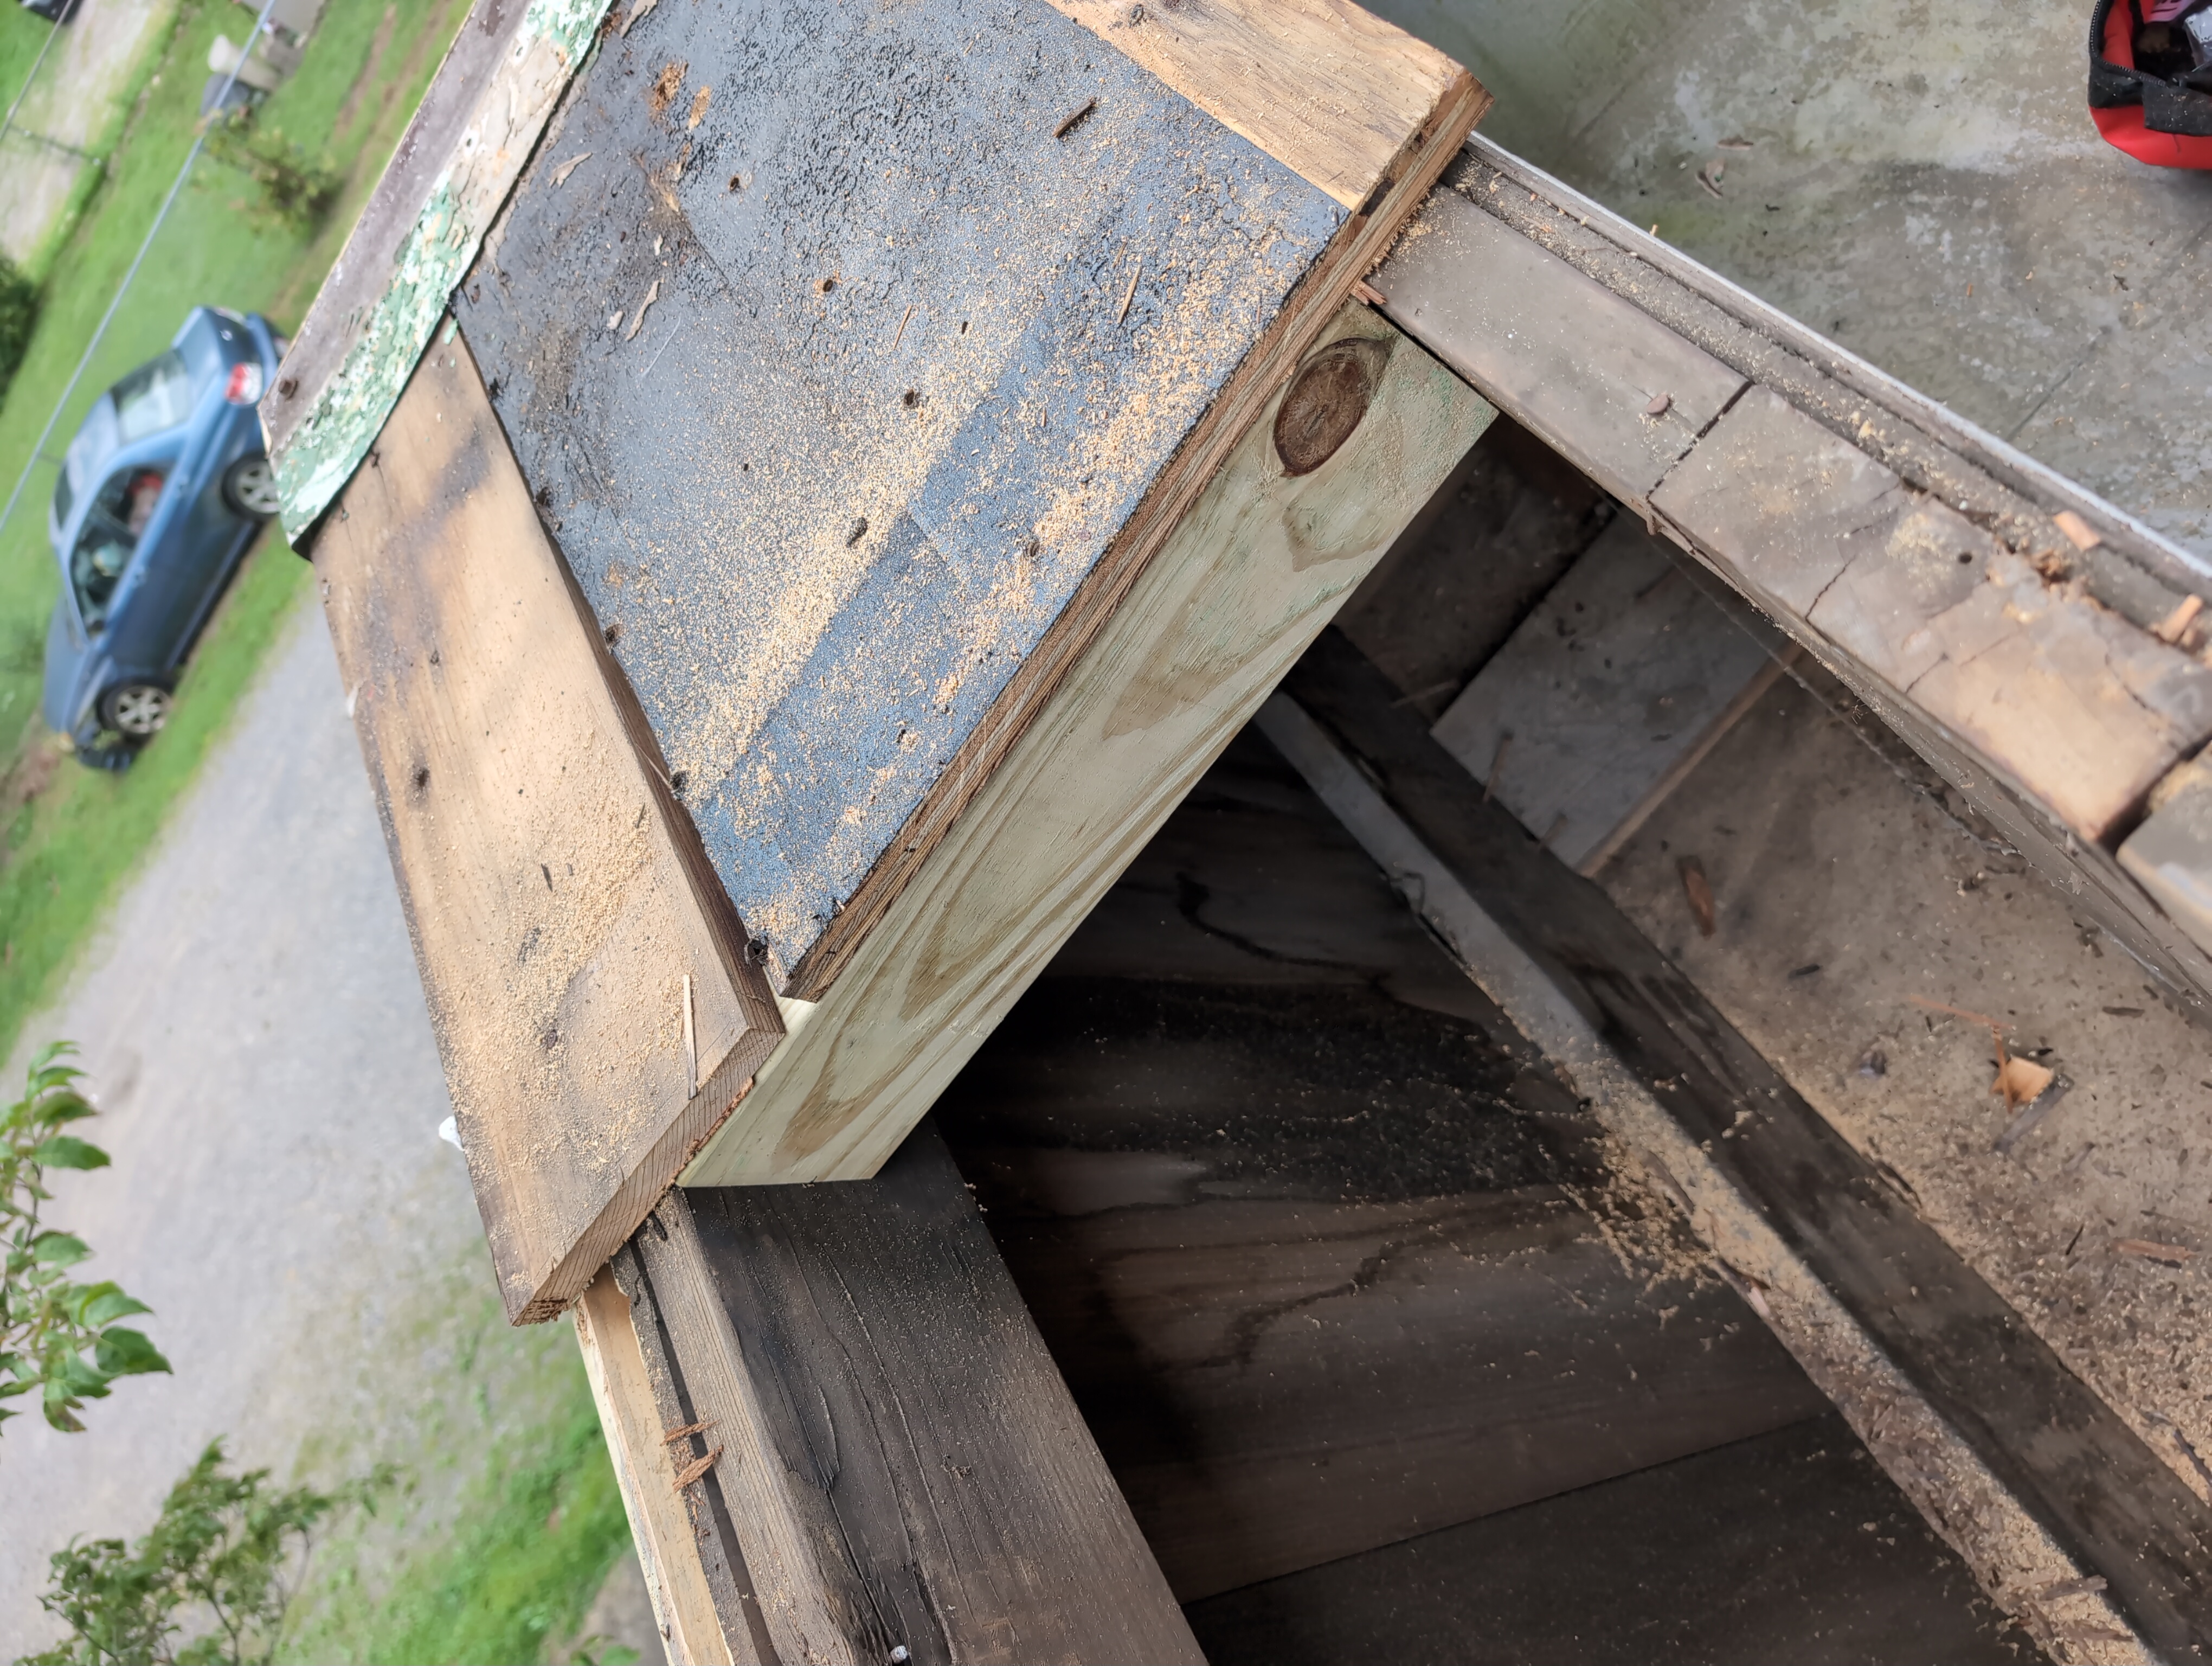
At this point, I was starting to worry about getting this all done. I was overdue for an afternoon coffee and desperately needed a snack, and despite the fact that it was still hours away I could feel the end of the light creeping up on me. I could also feel rain in the air, which was the last thing I wanted. But there was no where to go except forward. Luckily I also have a support team here, who made sure I had a snack bar and more water.
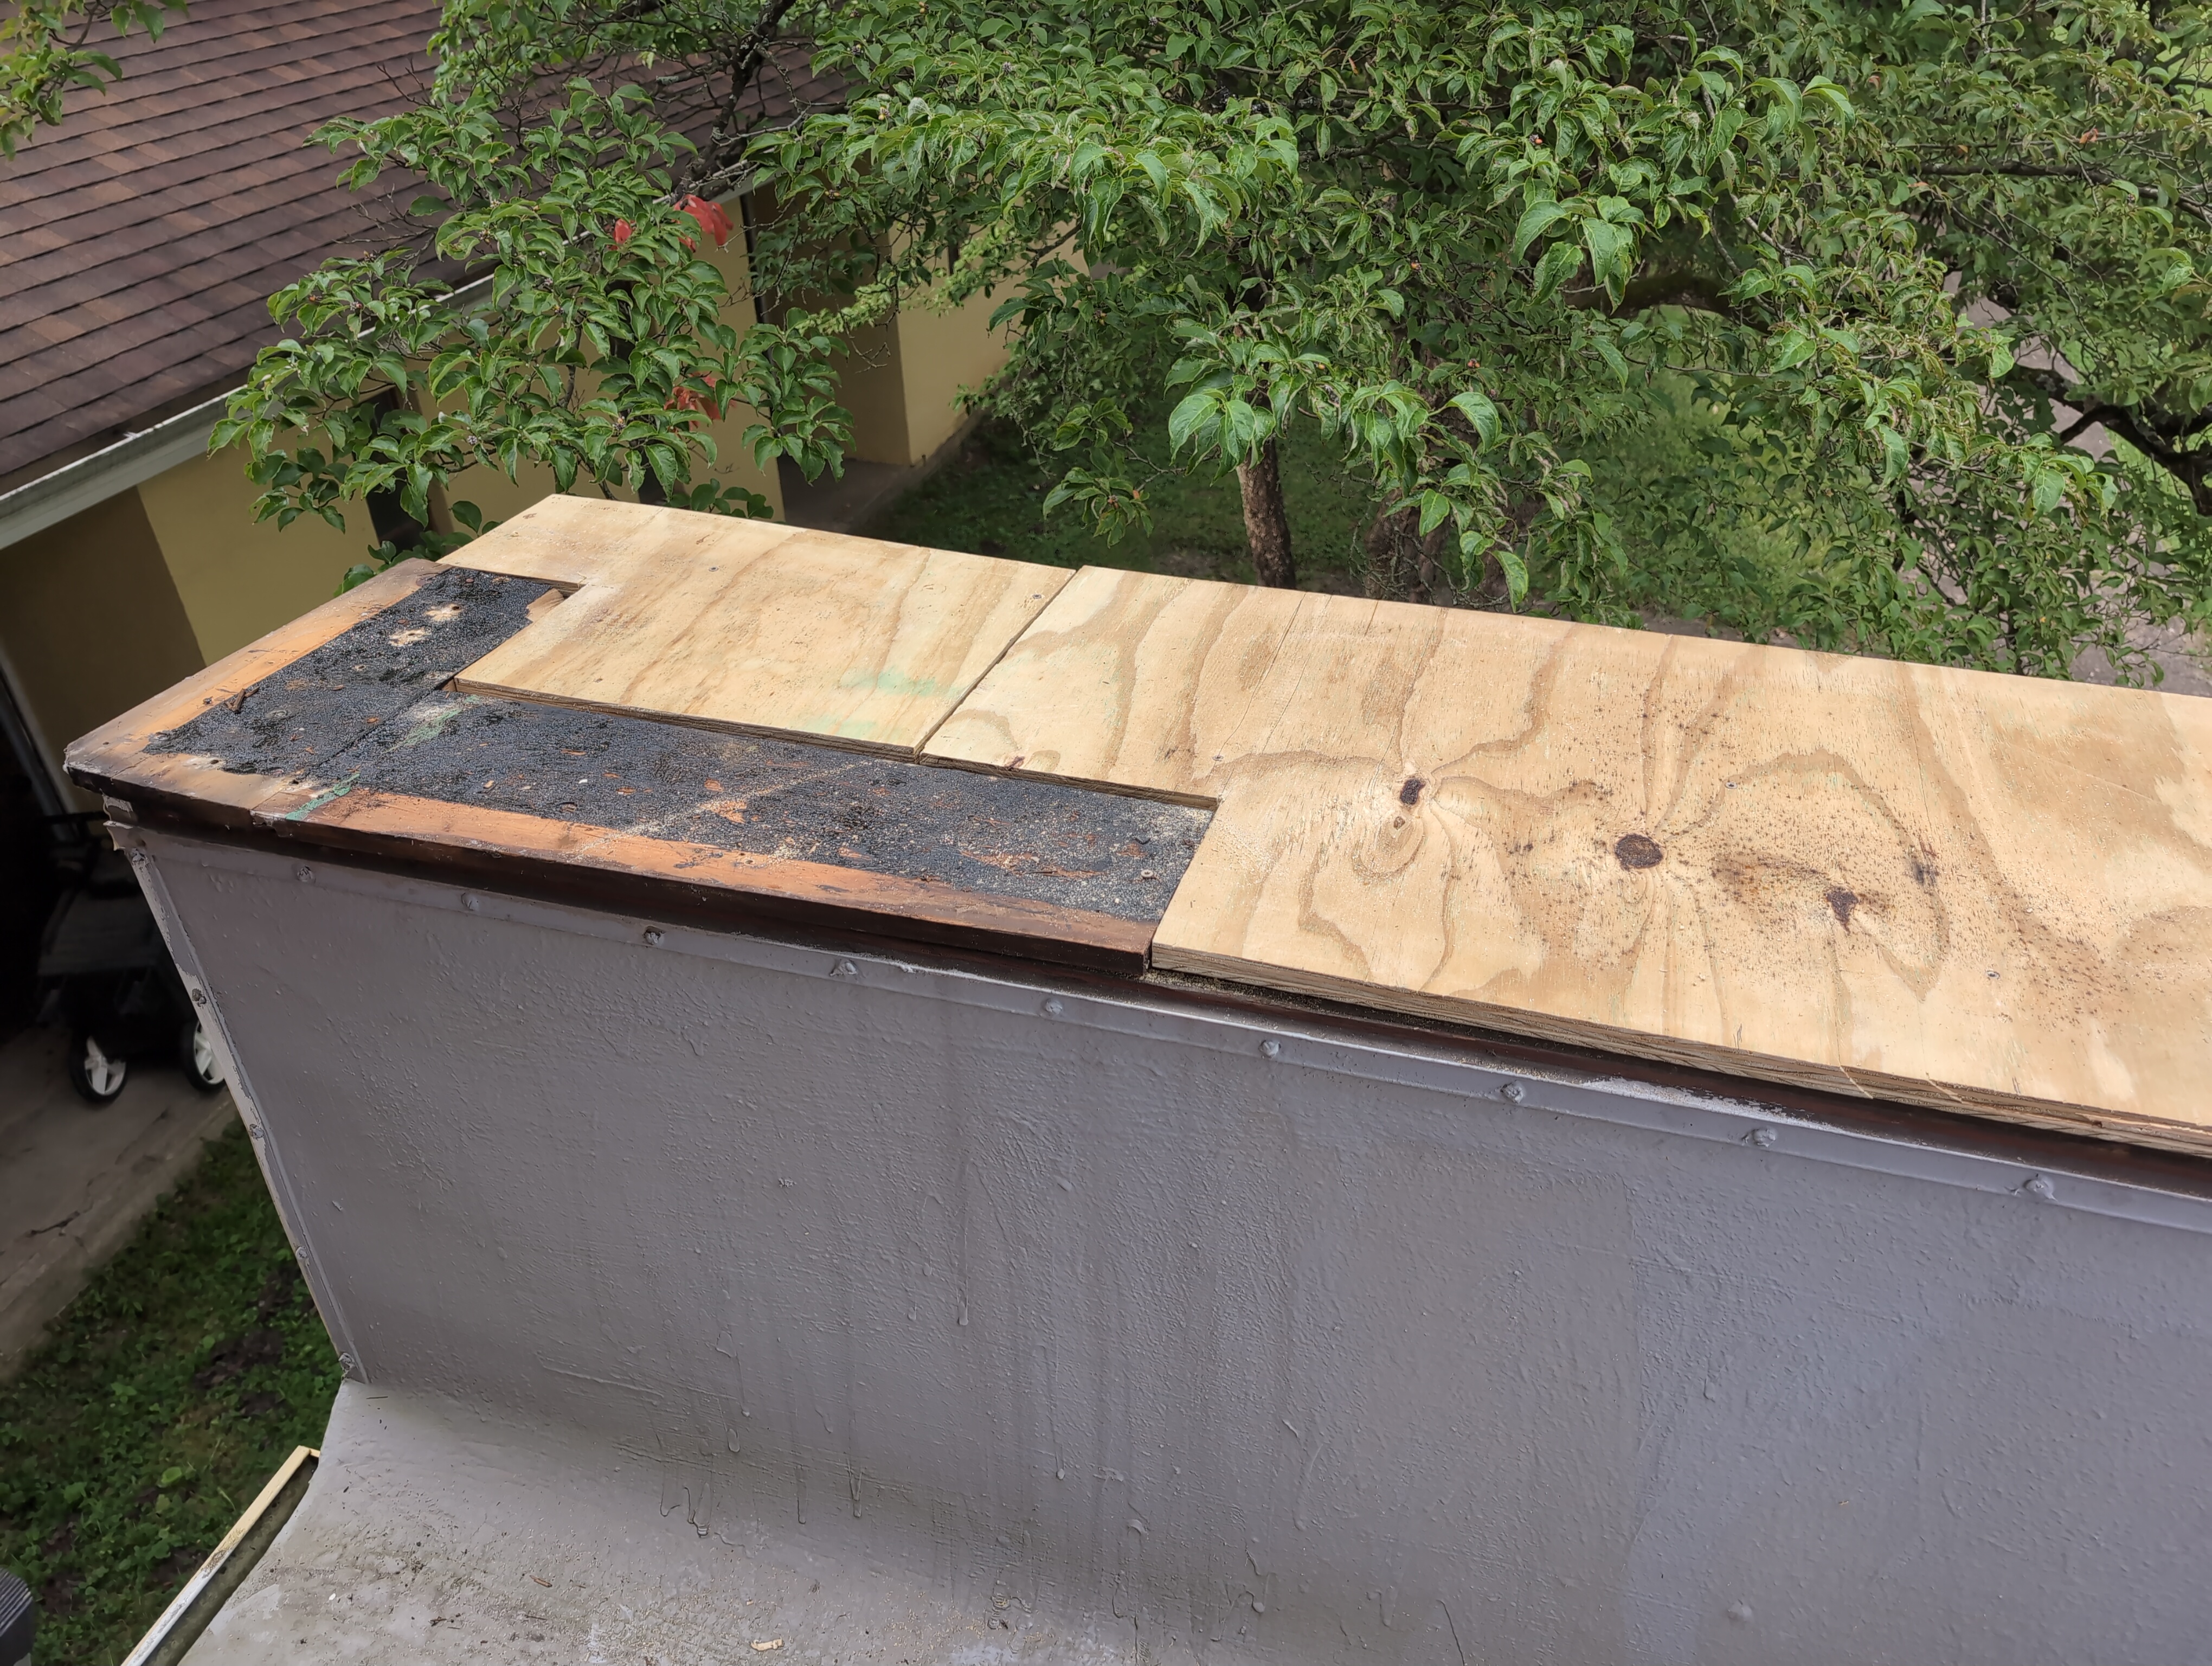
I got out the sawhorses and pulled out the plywood. I think the most challenging part of the whole project was getting a rough cut 23"x4ft long piece of plywood up the ladder! Bringing it back down after identifying what needed to be cut away to puzzle it into place was.. emotionally draining. Oddly, the cut out made it easier to bring it back up!
It probably would have been a simpler project if I had pulled all of the boards, but I couldn't bring myself to pull good wood out of where it was working. As it was, I managed to puzzle together something that frankly, looks better in this photo than it looked in real life. There are some significant gaps, but by then I didn't care. The sky was spitting lightly and the whole thing was going to be covered.
I took a break for a coffee, because the next bit was going to require some thought. The rolls of aluminum needed to be bent to have the overhangs that the original did, and there were shenanigans trying to make our own bending break. If I'd not been feeling the rush, I'm sure I would have taken photographs of us positioning long 1x.. I don't know, were those 1x4s? 1x6s? They were long lengths of wood we had in the back building where we put all the spare wood, which gave us the 8ft we needed. In the end, I could hand bend it to nearly the 90 degrees we needed, and used a non-marring mallet to firm up that bend, just bending the edge up against the side of the board while standing on it and then whacking it, going along the length and doing it in parts. The corners took a bit more of a think, but weren't that big of an issue either.
Those then went up the ladder. I traced the edges of each piece on the underside with the sealant adhesive, then made some best guesses on spacing of nails. I made sure that there was some significant overlap between each metal piece. After they were all down, I used up as much of the rest of the sealant tube as I could, following each seam.
Here's the last picture I took, knowing I was going to lose the light soon.
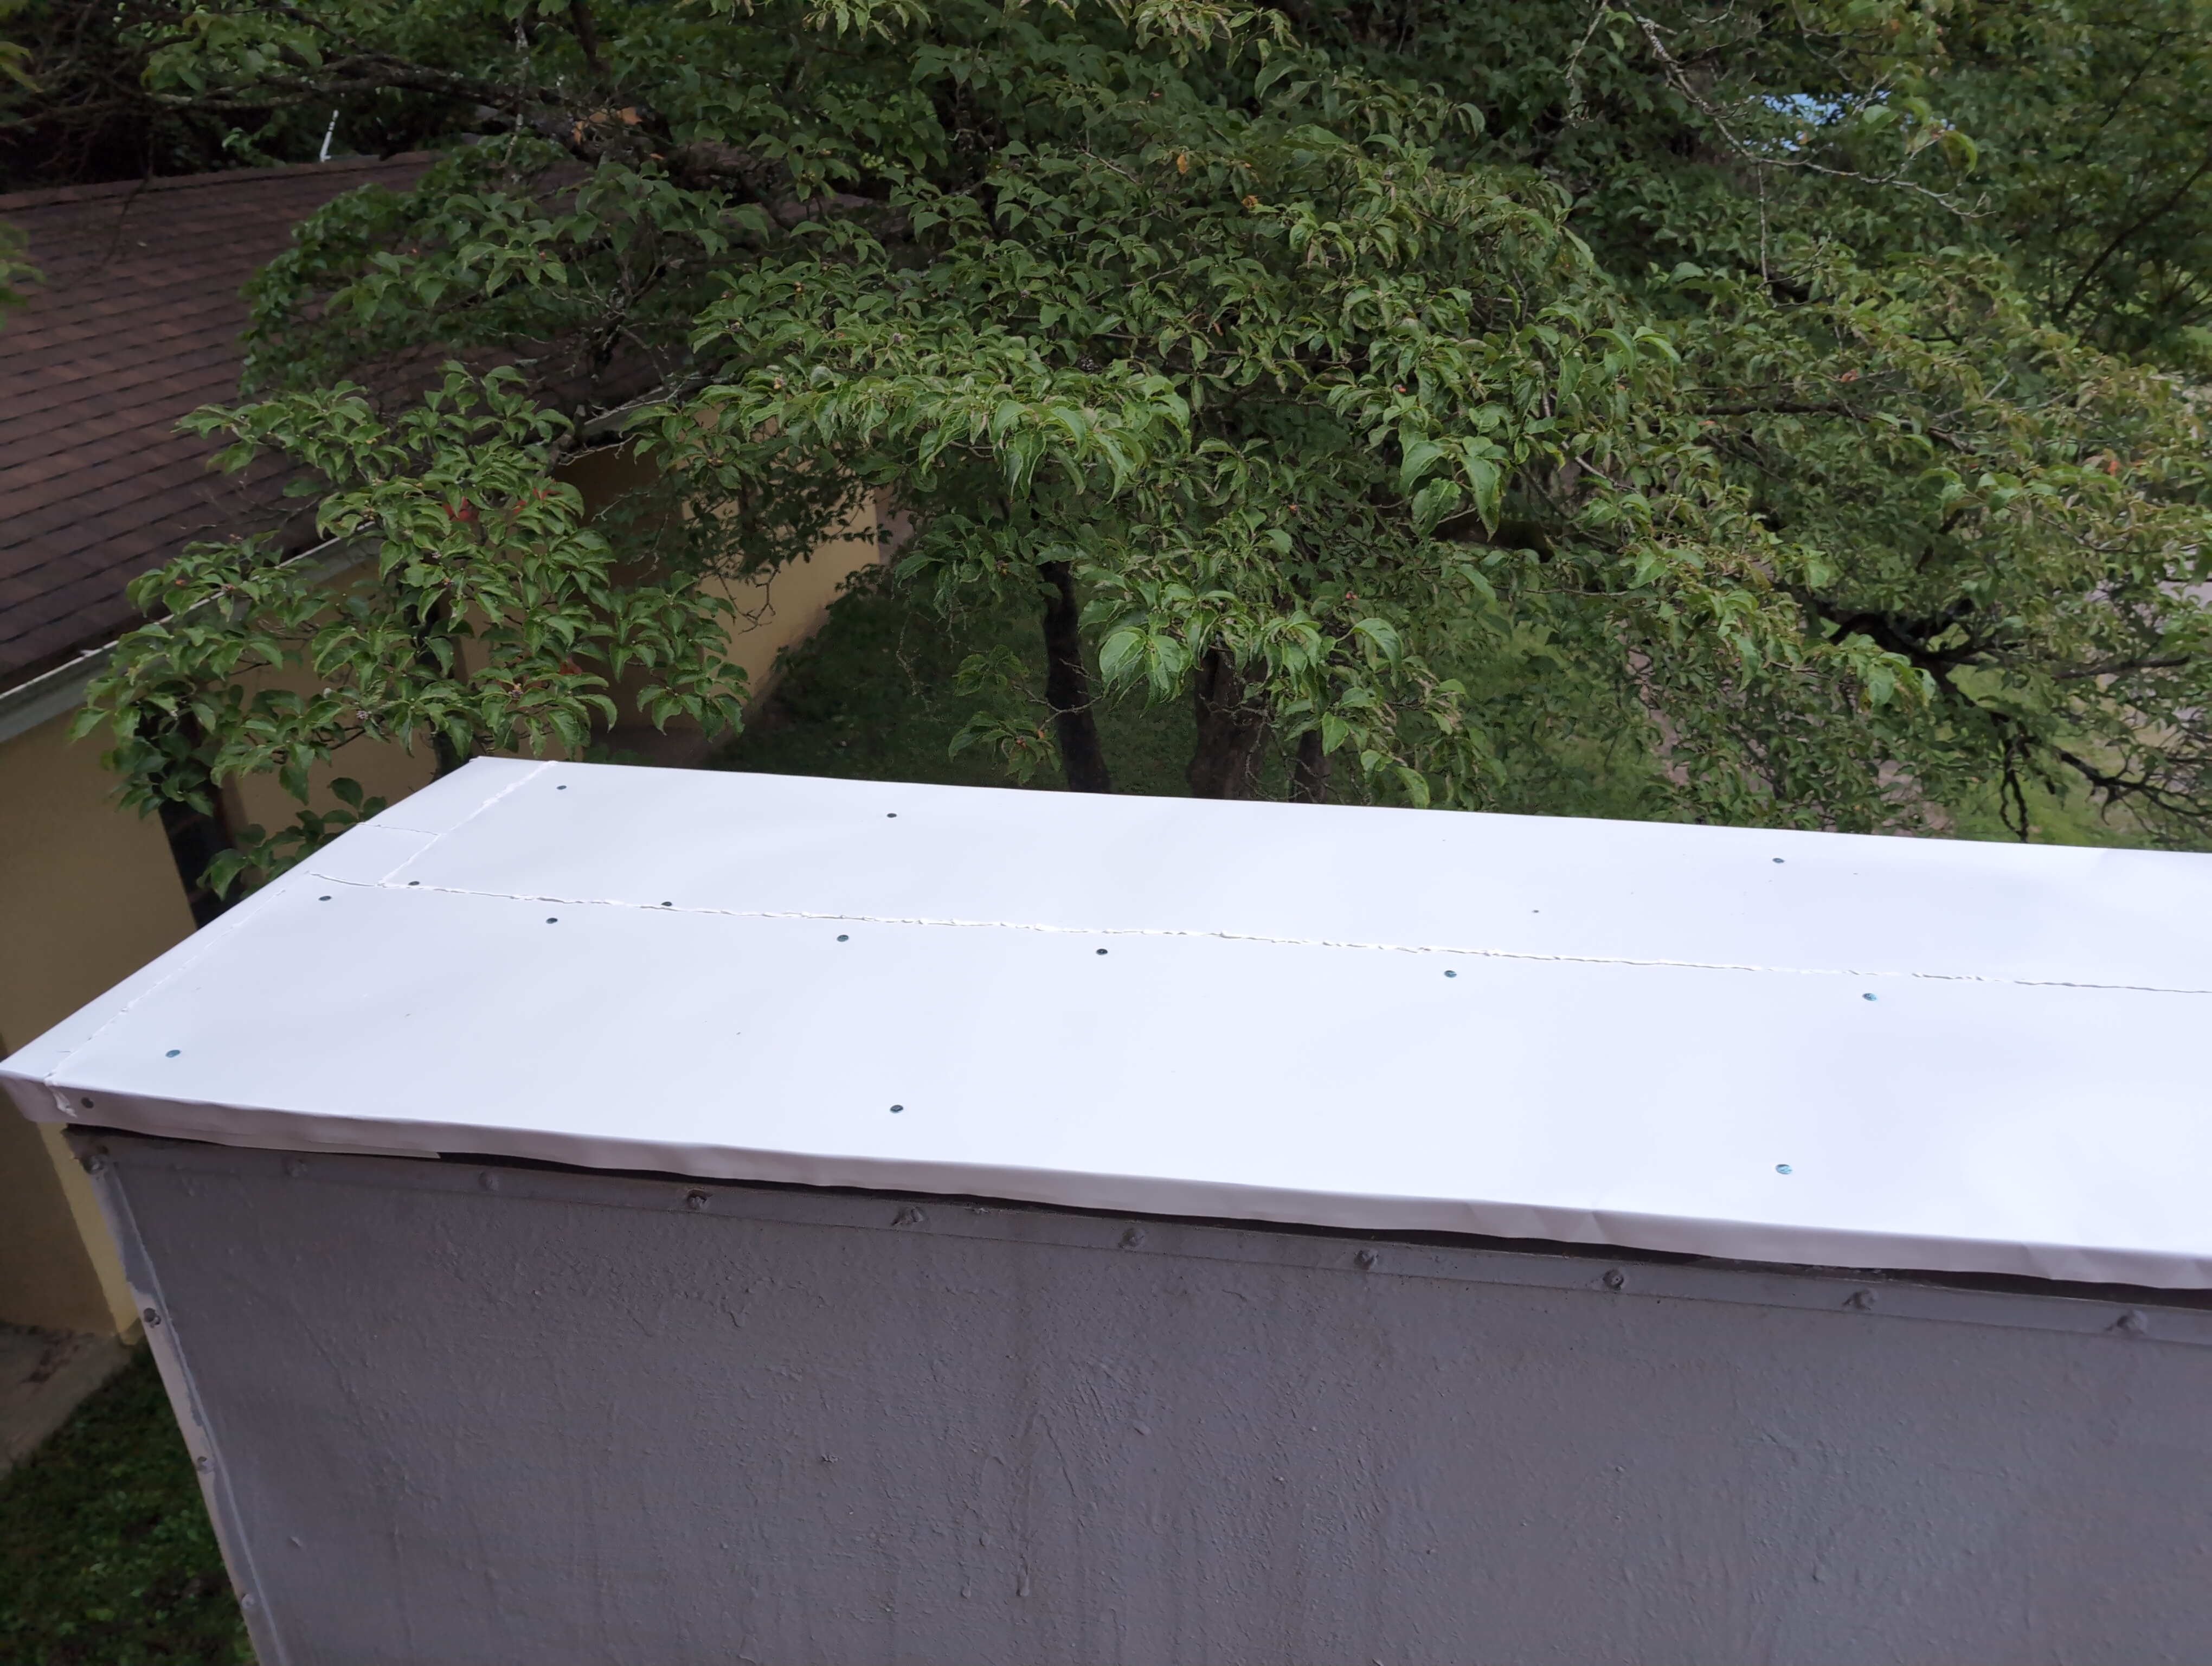
I then went back down to double check that I wasn't knowingly about to spray the rubber-y spray onto a surface it is specifically not supposed to go on (I got paranoid about what the white coating on the aluminum was, I didn't get an answer, but a lack of answer was enough for me at this point). In the half-dark the other clowns started helping me pack up the mess I'd made while I sprayed over the nails.
By the time we had brought everything inside, it was dark and I was well in need of a shower and some food.
I checked the time before heading to the shower, 9:05 PM.
It's the next day as I'm sat here writing this. I'm tired and sore, and it's been raining buckets off and on all day. I don't know if the ladder is coming out tomorrow, but I do know I'll be taking it out on Tuesday. I've got a plan to fight the moss on the back building's roof!
I really hope that the various protective goops had enough time to cure before the rain hit. I'll check back in and let y'all know!
Update 2026-08-04: Looks like it held up through the storms! I still have a piece of trim I'd like to replace on it, and I'll be giving it all a fresh coat of paint, hopefully before winter arrives. But I'm impressed with what I accomplished.
Something that I failed to point out when I did this write up;
I know next to nothing about roofing. I have only just started dipping a toe into carpentry. And normally I do a significant amount of research and planning before I take on a project.
A year ago I wasn't capable of taking this task on. I argueably had almost as much knowledge about the subject as I now do, but while I have very little experience woodworking, I have gotten aquainted with a few power tools, and so while I still respect the dangers in using them, I'm not scared of these ones at this point. I have also honed skill in figuring out what it is I'm looking at when it comes to how something was constructed, and have built a small amount of capability in thinking through to answers of "how would I put it back together if I took this apart?".
I still would have prefered to have a bit more time in the planning stage on this one, but as it was? I had the capability of improving a situation, and keeping it from getting worse. I'm really excited to discover that!